DIY – Nailed it!
I wrote in a previous #ArchiTalks post about crafts that I always enjoy seeing the Pinterest fails. The HGTV effect, or the Martha effect…the insane amount of DIYs available that are made to look easy for the everyday person…masking the reality of how hard they are.

Probably partially because of my personality and partially because of my profession, I’m the person in the family that gets asked to DIY this or that. It’s important to realize, though, that doesn’t mean we creatives always get it right on the first time. I had one such example recently, so I thought I’d share the ins and outs – and the ups and downs – of the land of DIY.
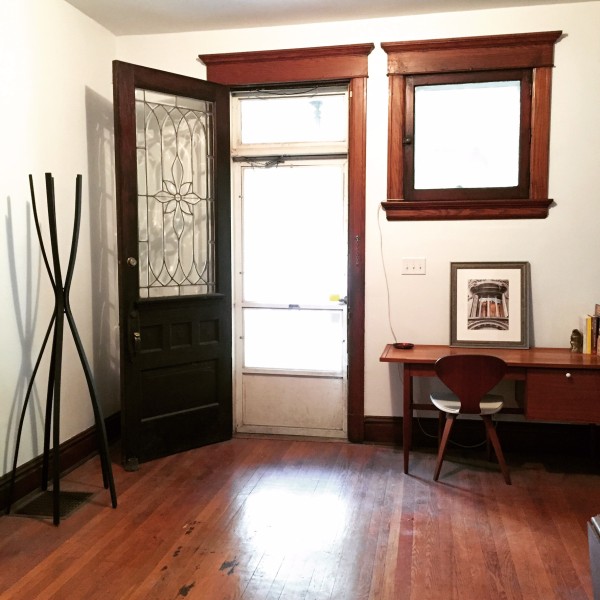
As most of you (hopefully) have been following along in #ThisOldHouse renovation happenings, the entryway has been mostly done for some time, outside of a lack of chandelier.

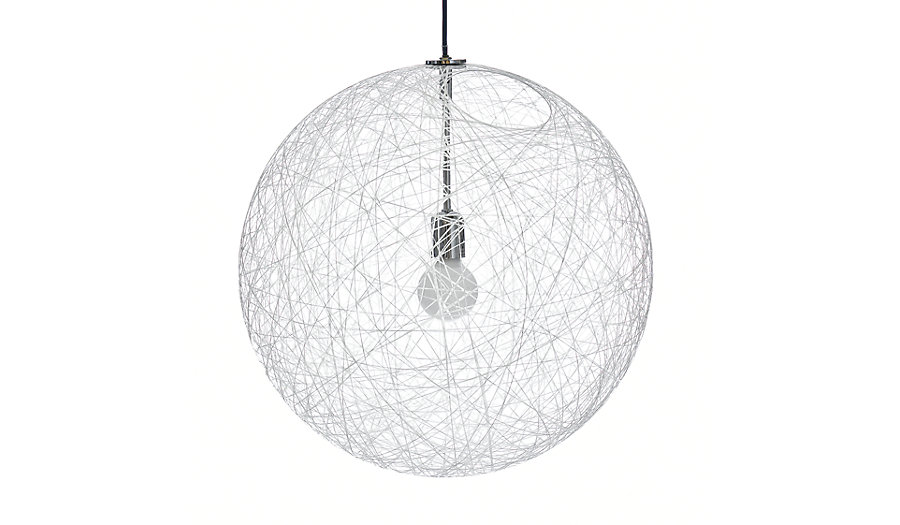
You see, this is because the chandelier I want is the random light by moooi. But it’s $3,000. And when you have a whole house under construction and are renovating on a single salary, a $3,000 light is more than not in the budget.
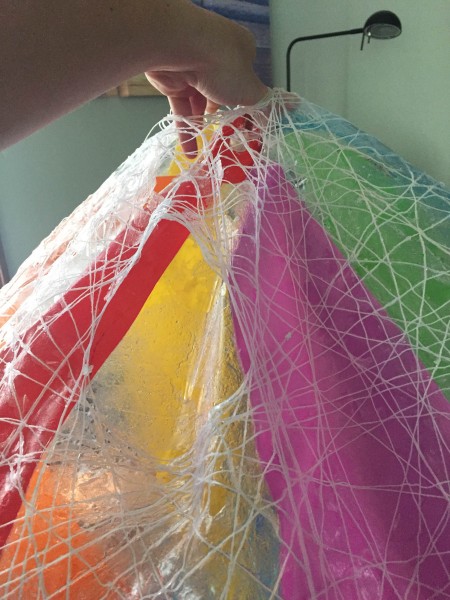
So I did what any creative would do (right?!?)…and decided to make it myself. I had some fine crochet thread and a full bottle of mod podge. All I needed was a beach ball, a clamp of some sort, and a pendant light. The pendant I found pretty easily – IKEA is a wonderful place. The beach ball was a wallyworld purchase, 24″ wide. The clamp wasn’t as easy to come by. I ended up finding a rope clamp in the hardware section at Lowe’s, small enough to grip around the pendant cord tightly to keep the weave at a certain length.
I set off back to #ThisOldHouse to get started on the project. Step one was to unravel the length of the thread into the bowl of mod podge and let it soak. While it soaked, I blew up the beach ball and drew a circle with a sharpie to maintain the hole opening for switching out the lights in the pendant. And then I got to the mess of it. 4 hours of mess…wrapping the string around the beach ball in a somewhat cohesive shape, being sure to steer clear of the two circles for the pendant location and the hand opening. I luckily thought ahead and put a tarp down, but it’s still not the neatest DIY. (You are warned) When I was done, I was already concerned with it’s structure, but decided to let it dry for 24hrs and see how it went.
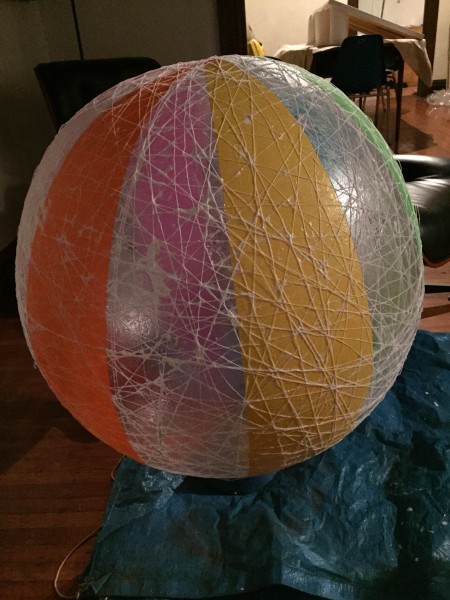
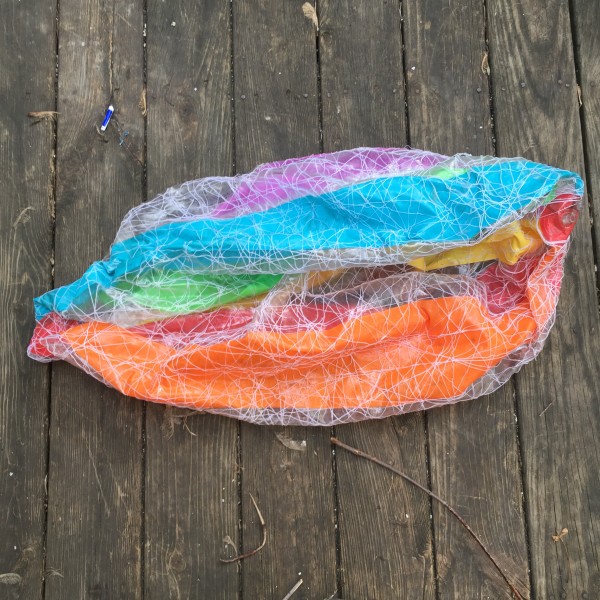
As you can see, the initial DIY didn’t work so well. *Nailed it!*
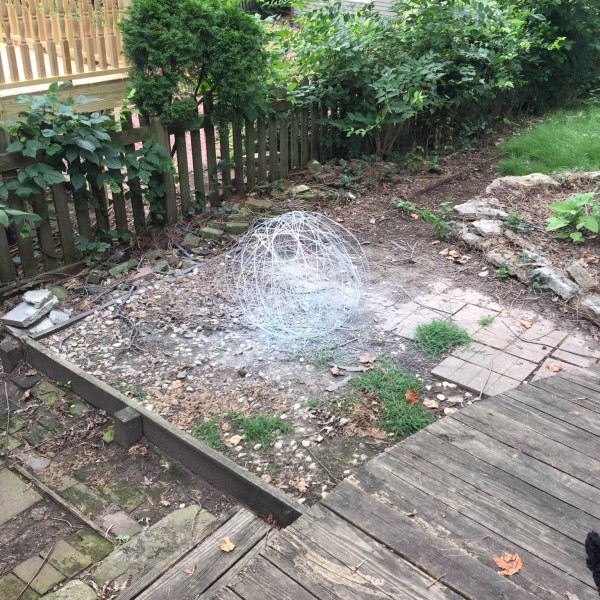
So I decided I needed to beef up the stringing of the structure and went back to Lowes in search of some sort of wire. There are moments where you get the newbie who’s less helpful than the aisle markers…and then there are some moments where you get someone willing to think on different levels, different creative lines, and help you source out creative solutions. I thankfully got the latter on this trip and what I ended up leaving with was a roll of rebar tie wire. You know…the stuff you use on a construction site to tie the different pieces of rebar together while waiting for concrete?
It wasn’t as easy to form around the beach ball as the sticky string – it’s much more slippery and less likely to hold together – but after a couple tries I got the hang of it. I ended up using some small wires that initially held the coils together to hold the wire together in important places.
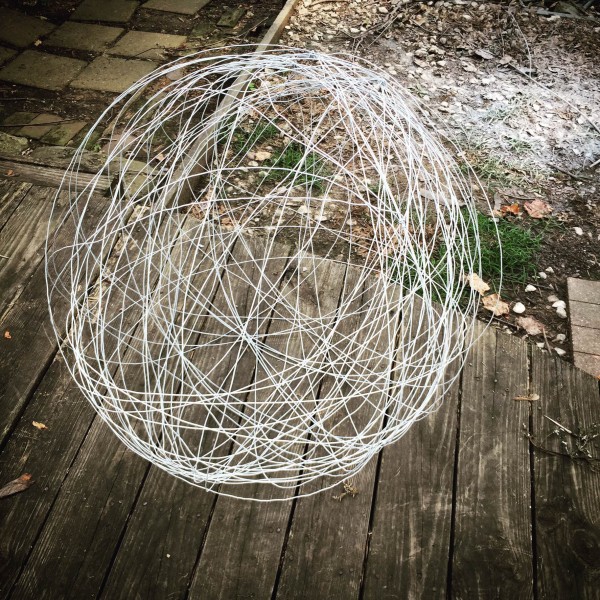
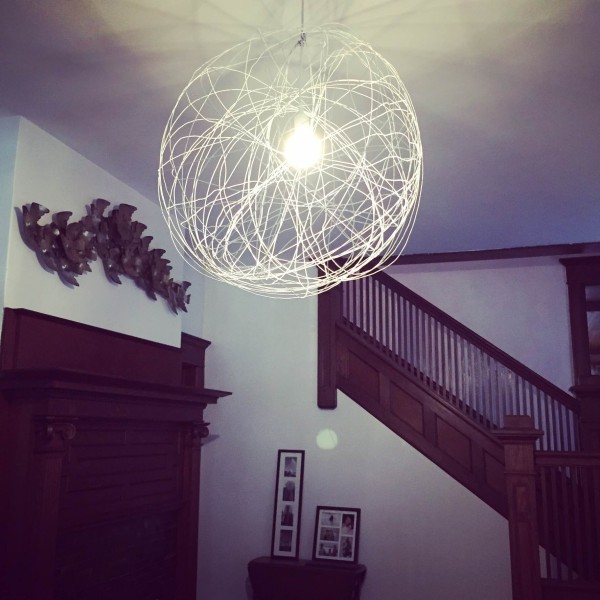
After wiring, I spray painted it outside, took apart the pendant and wired it through the chandelier, using the clamps to hold the pendant cord in place. It’s not quite a moooi, but it’ll do for #ThisOldHouse.
Try, try again. Perseverance is the key to all DIYs.
Until next time,