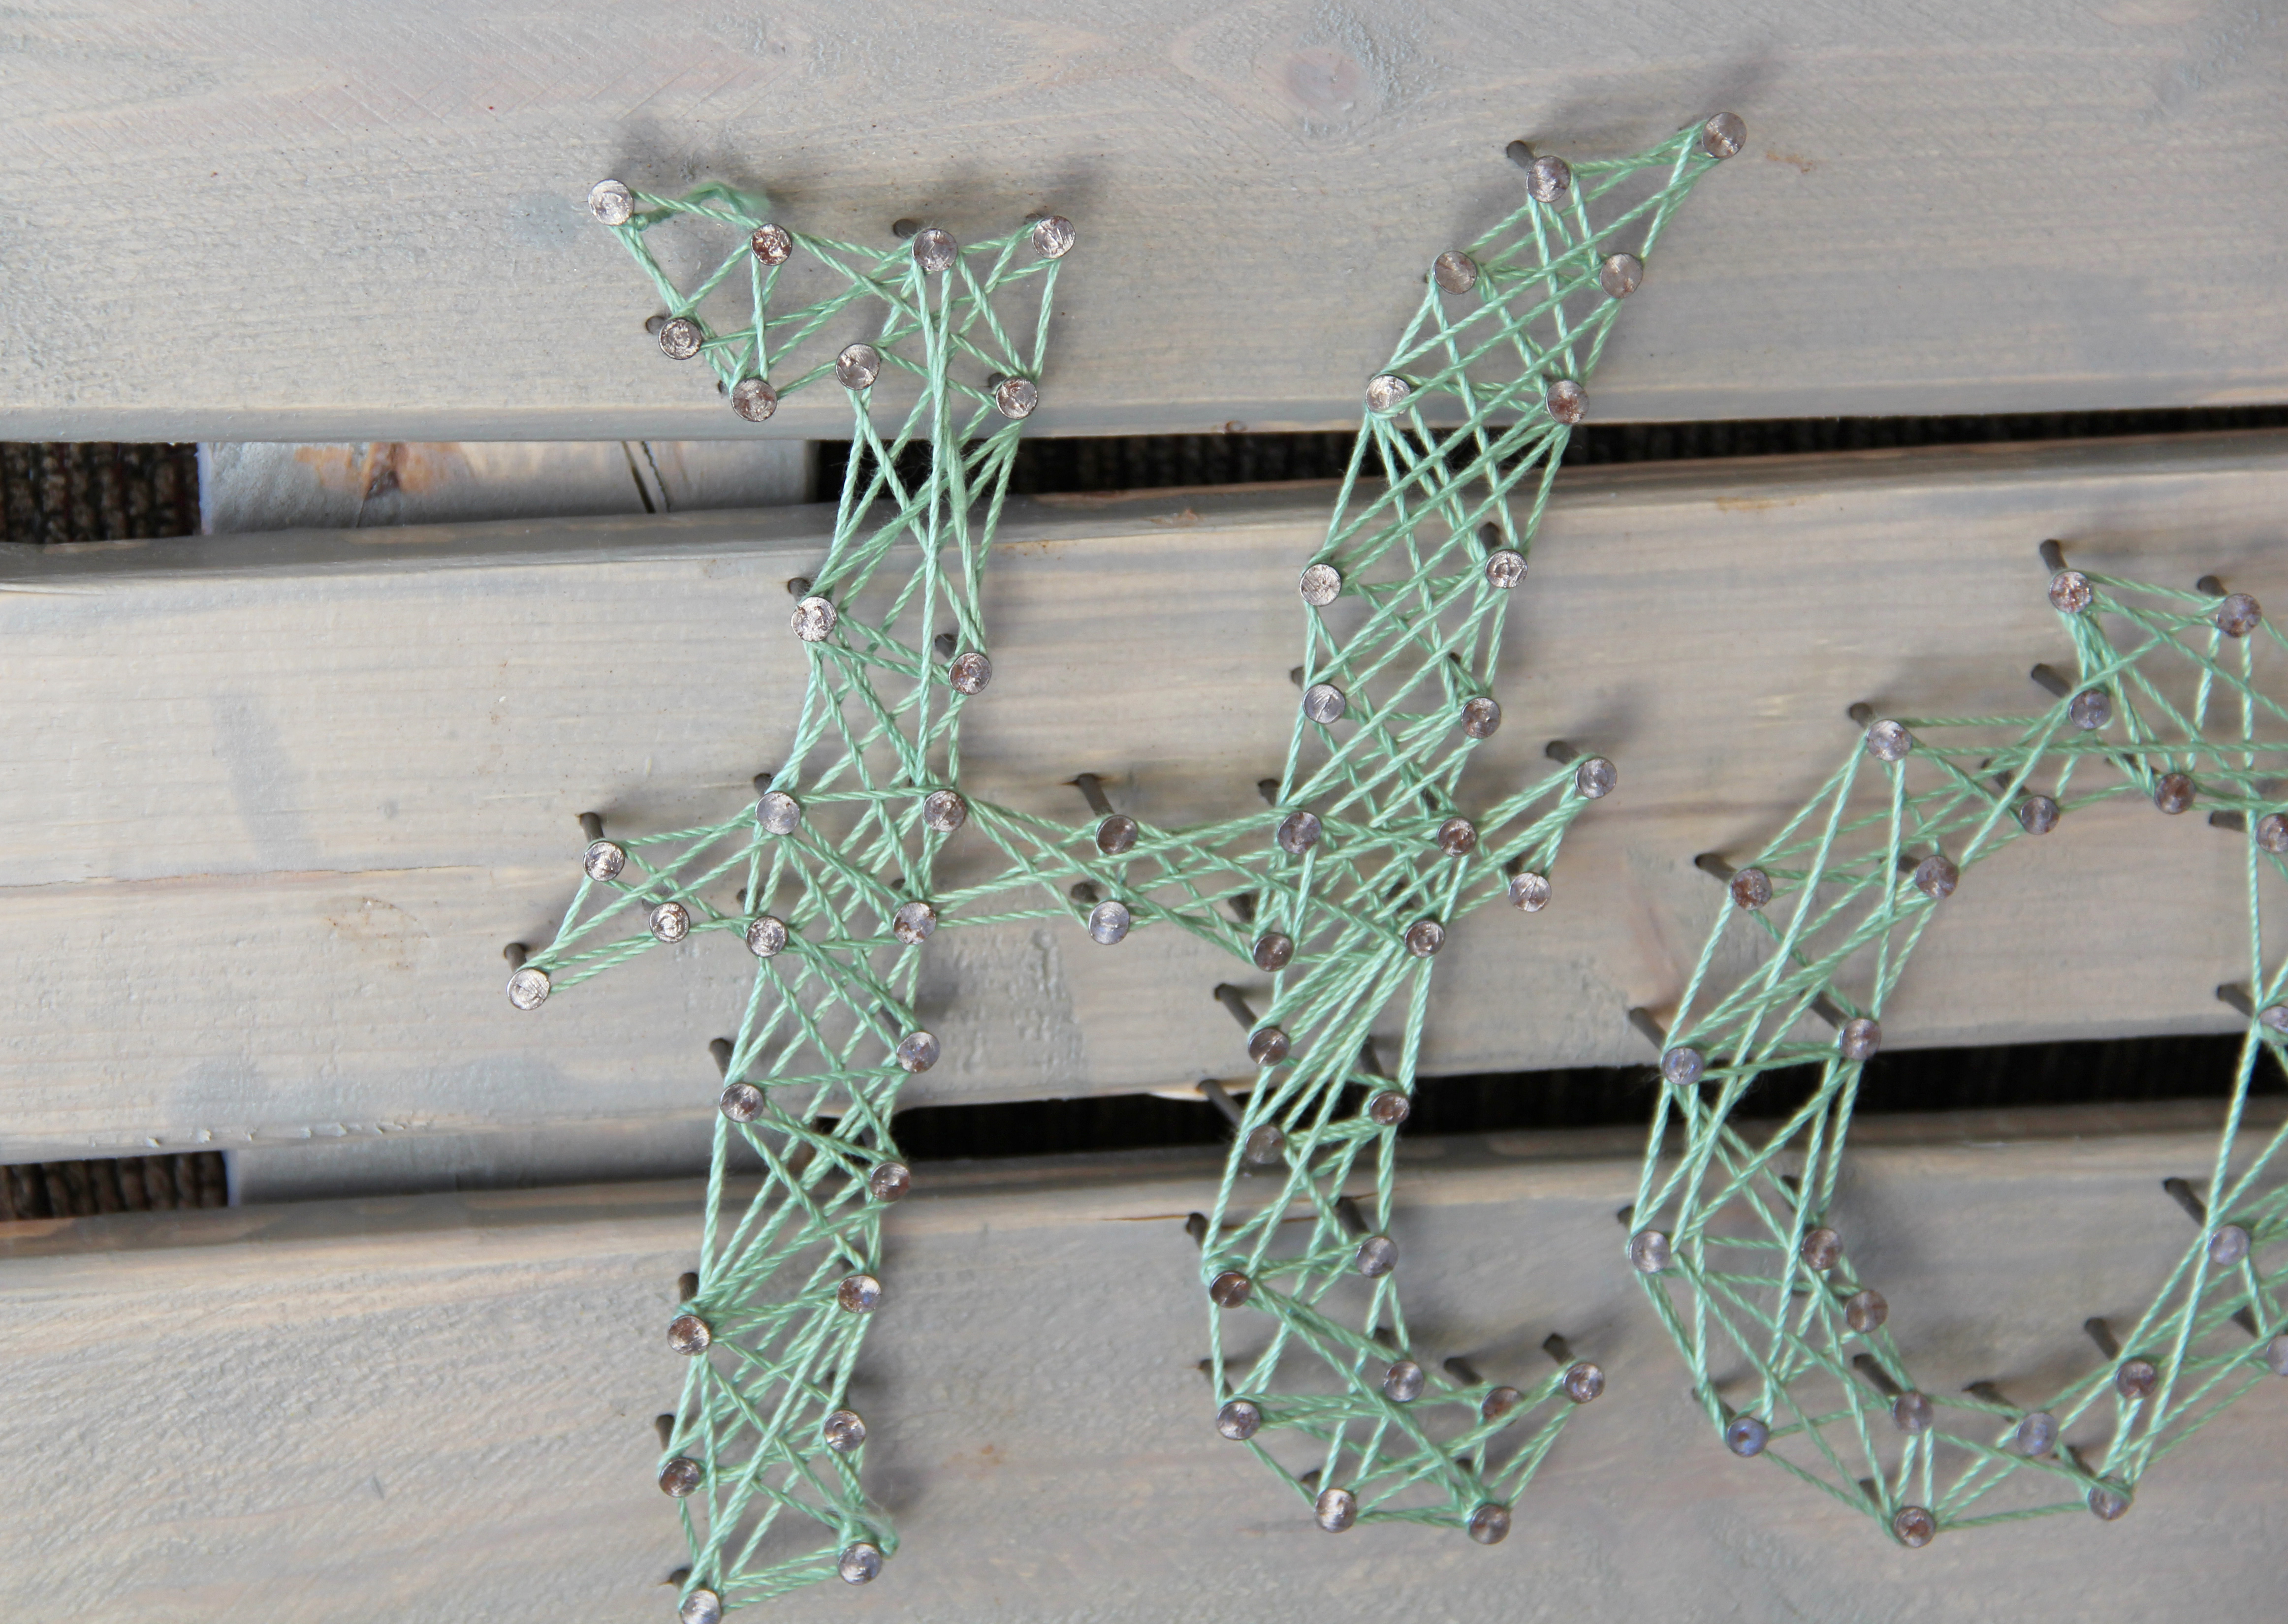
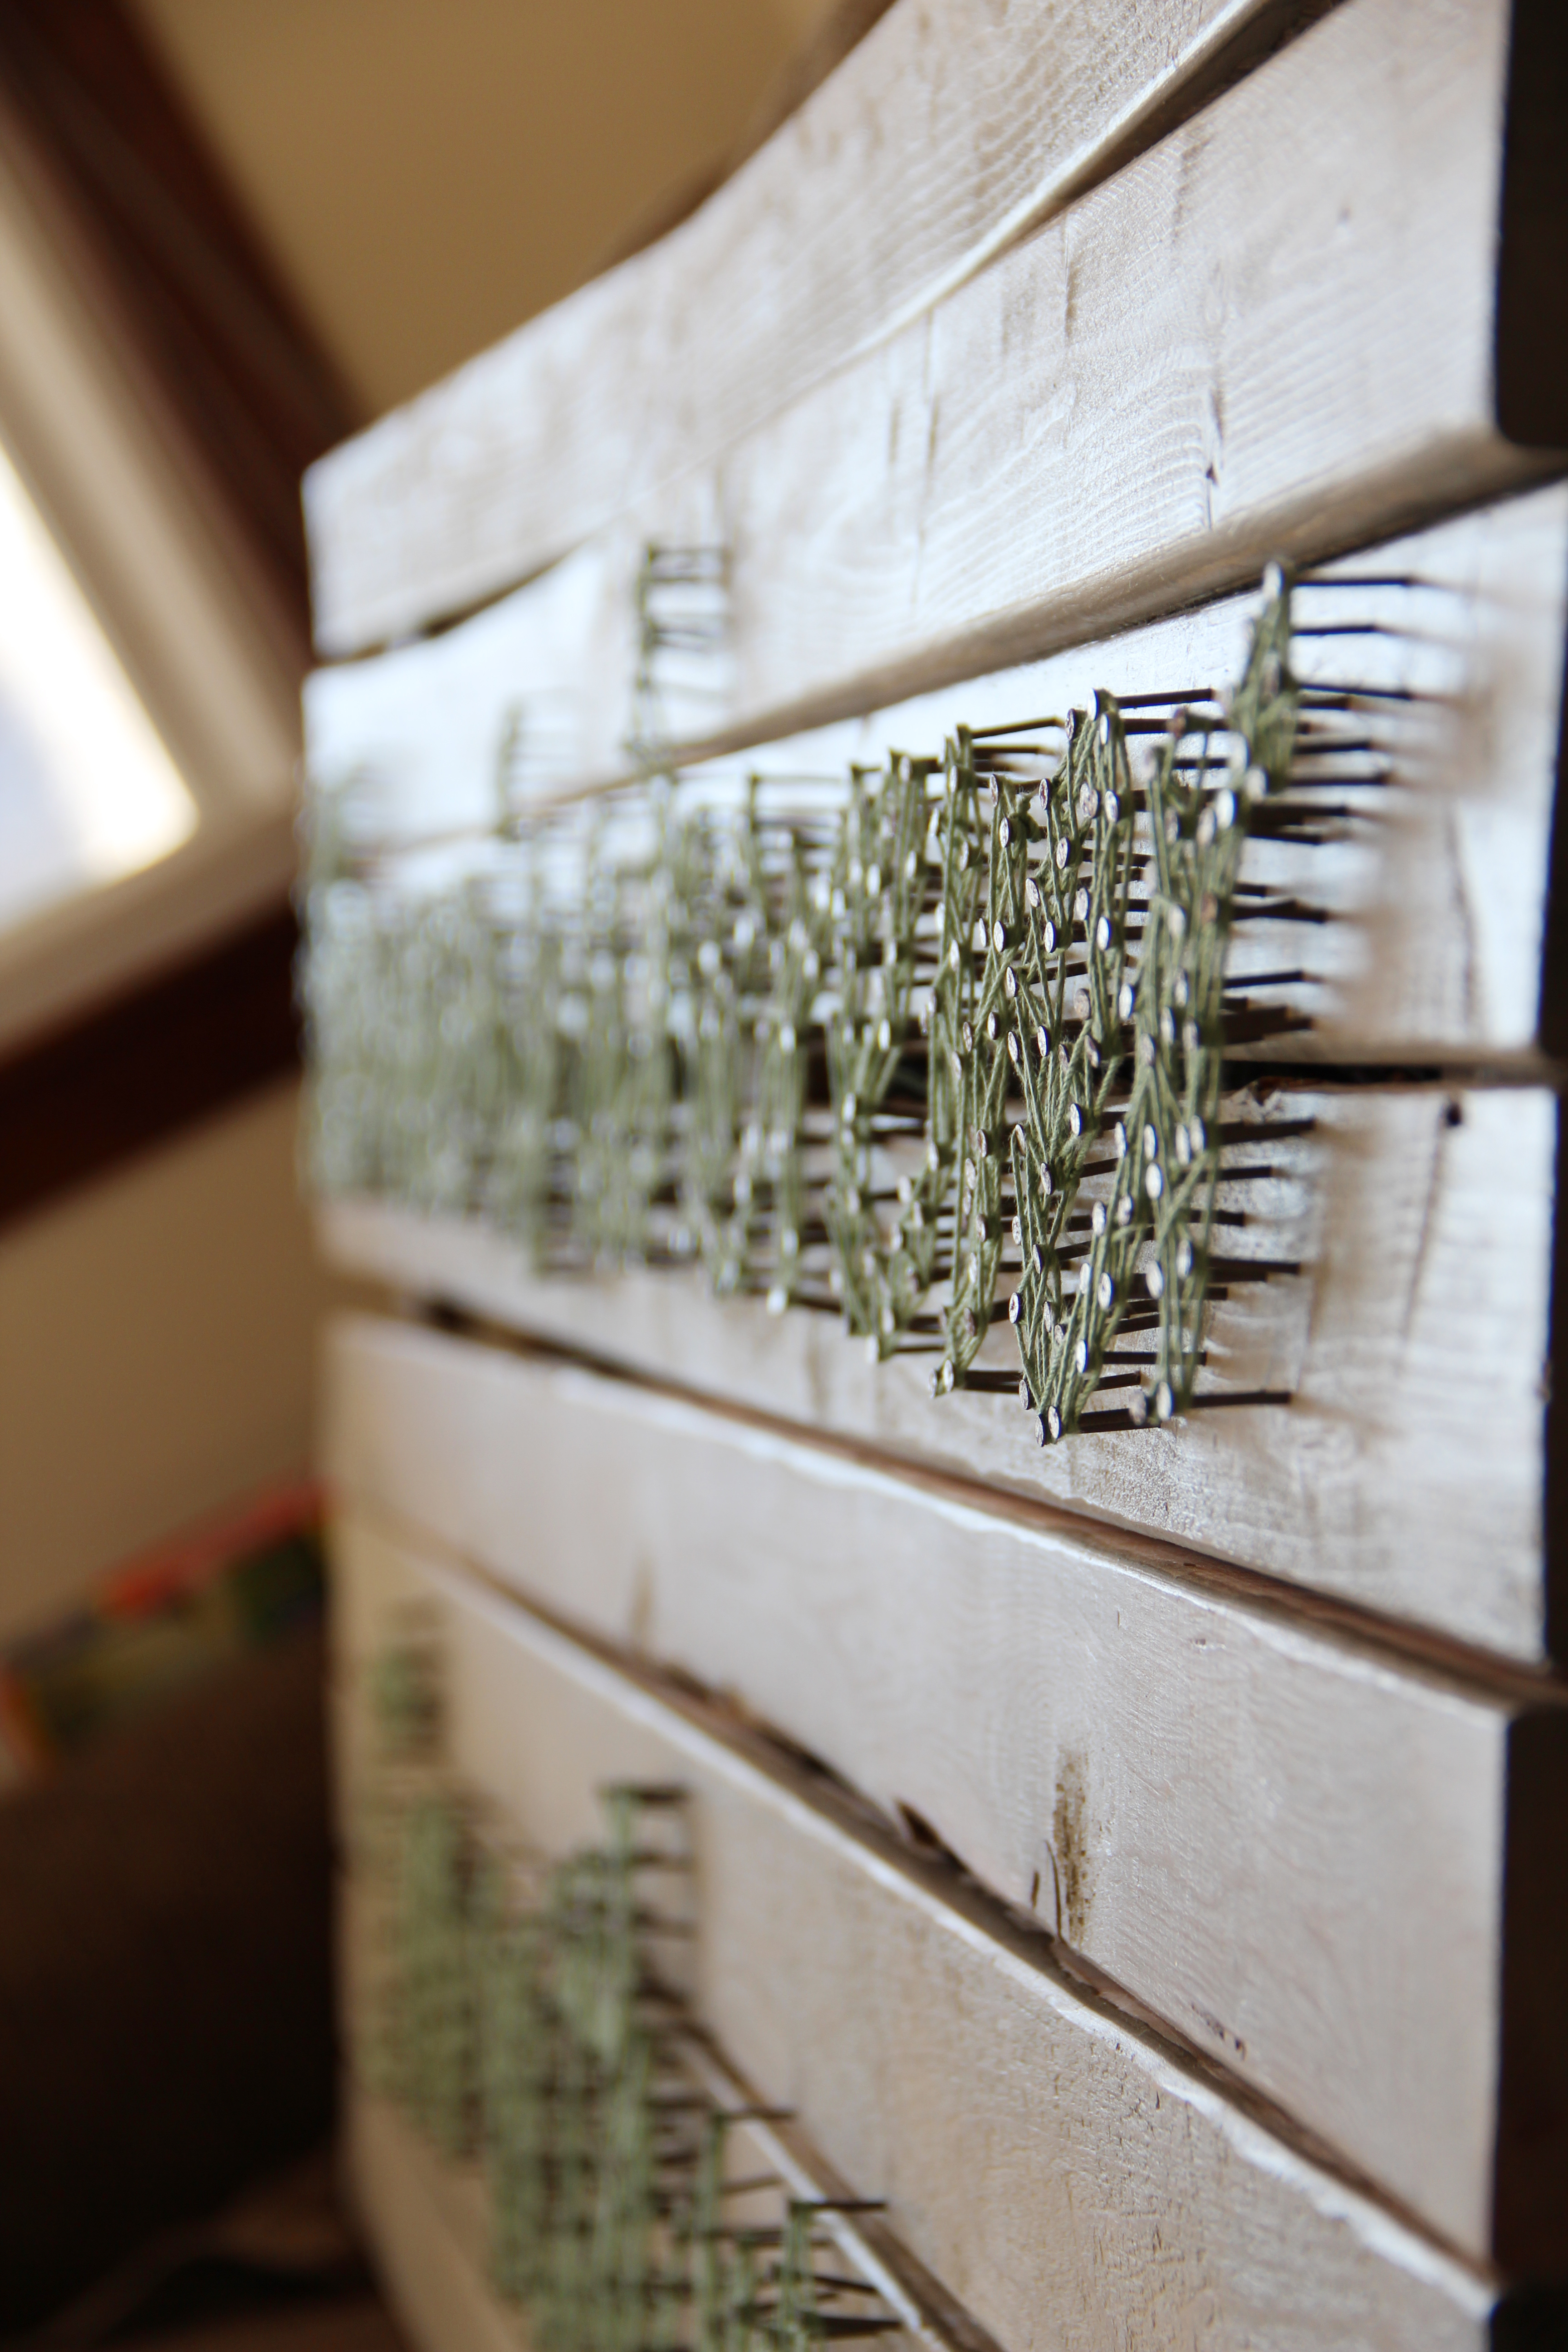
843 Nails.
That’s how many it took to complete the design of this project. Not to mention the screws for the wood connections.
And guess what?
I loved every minute of it.
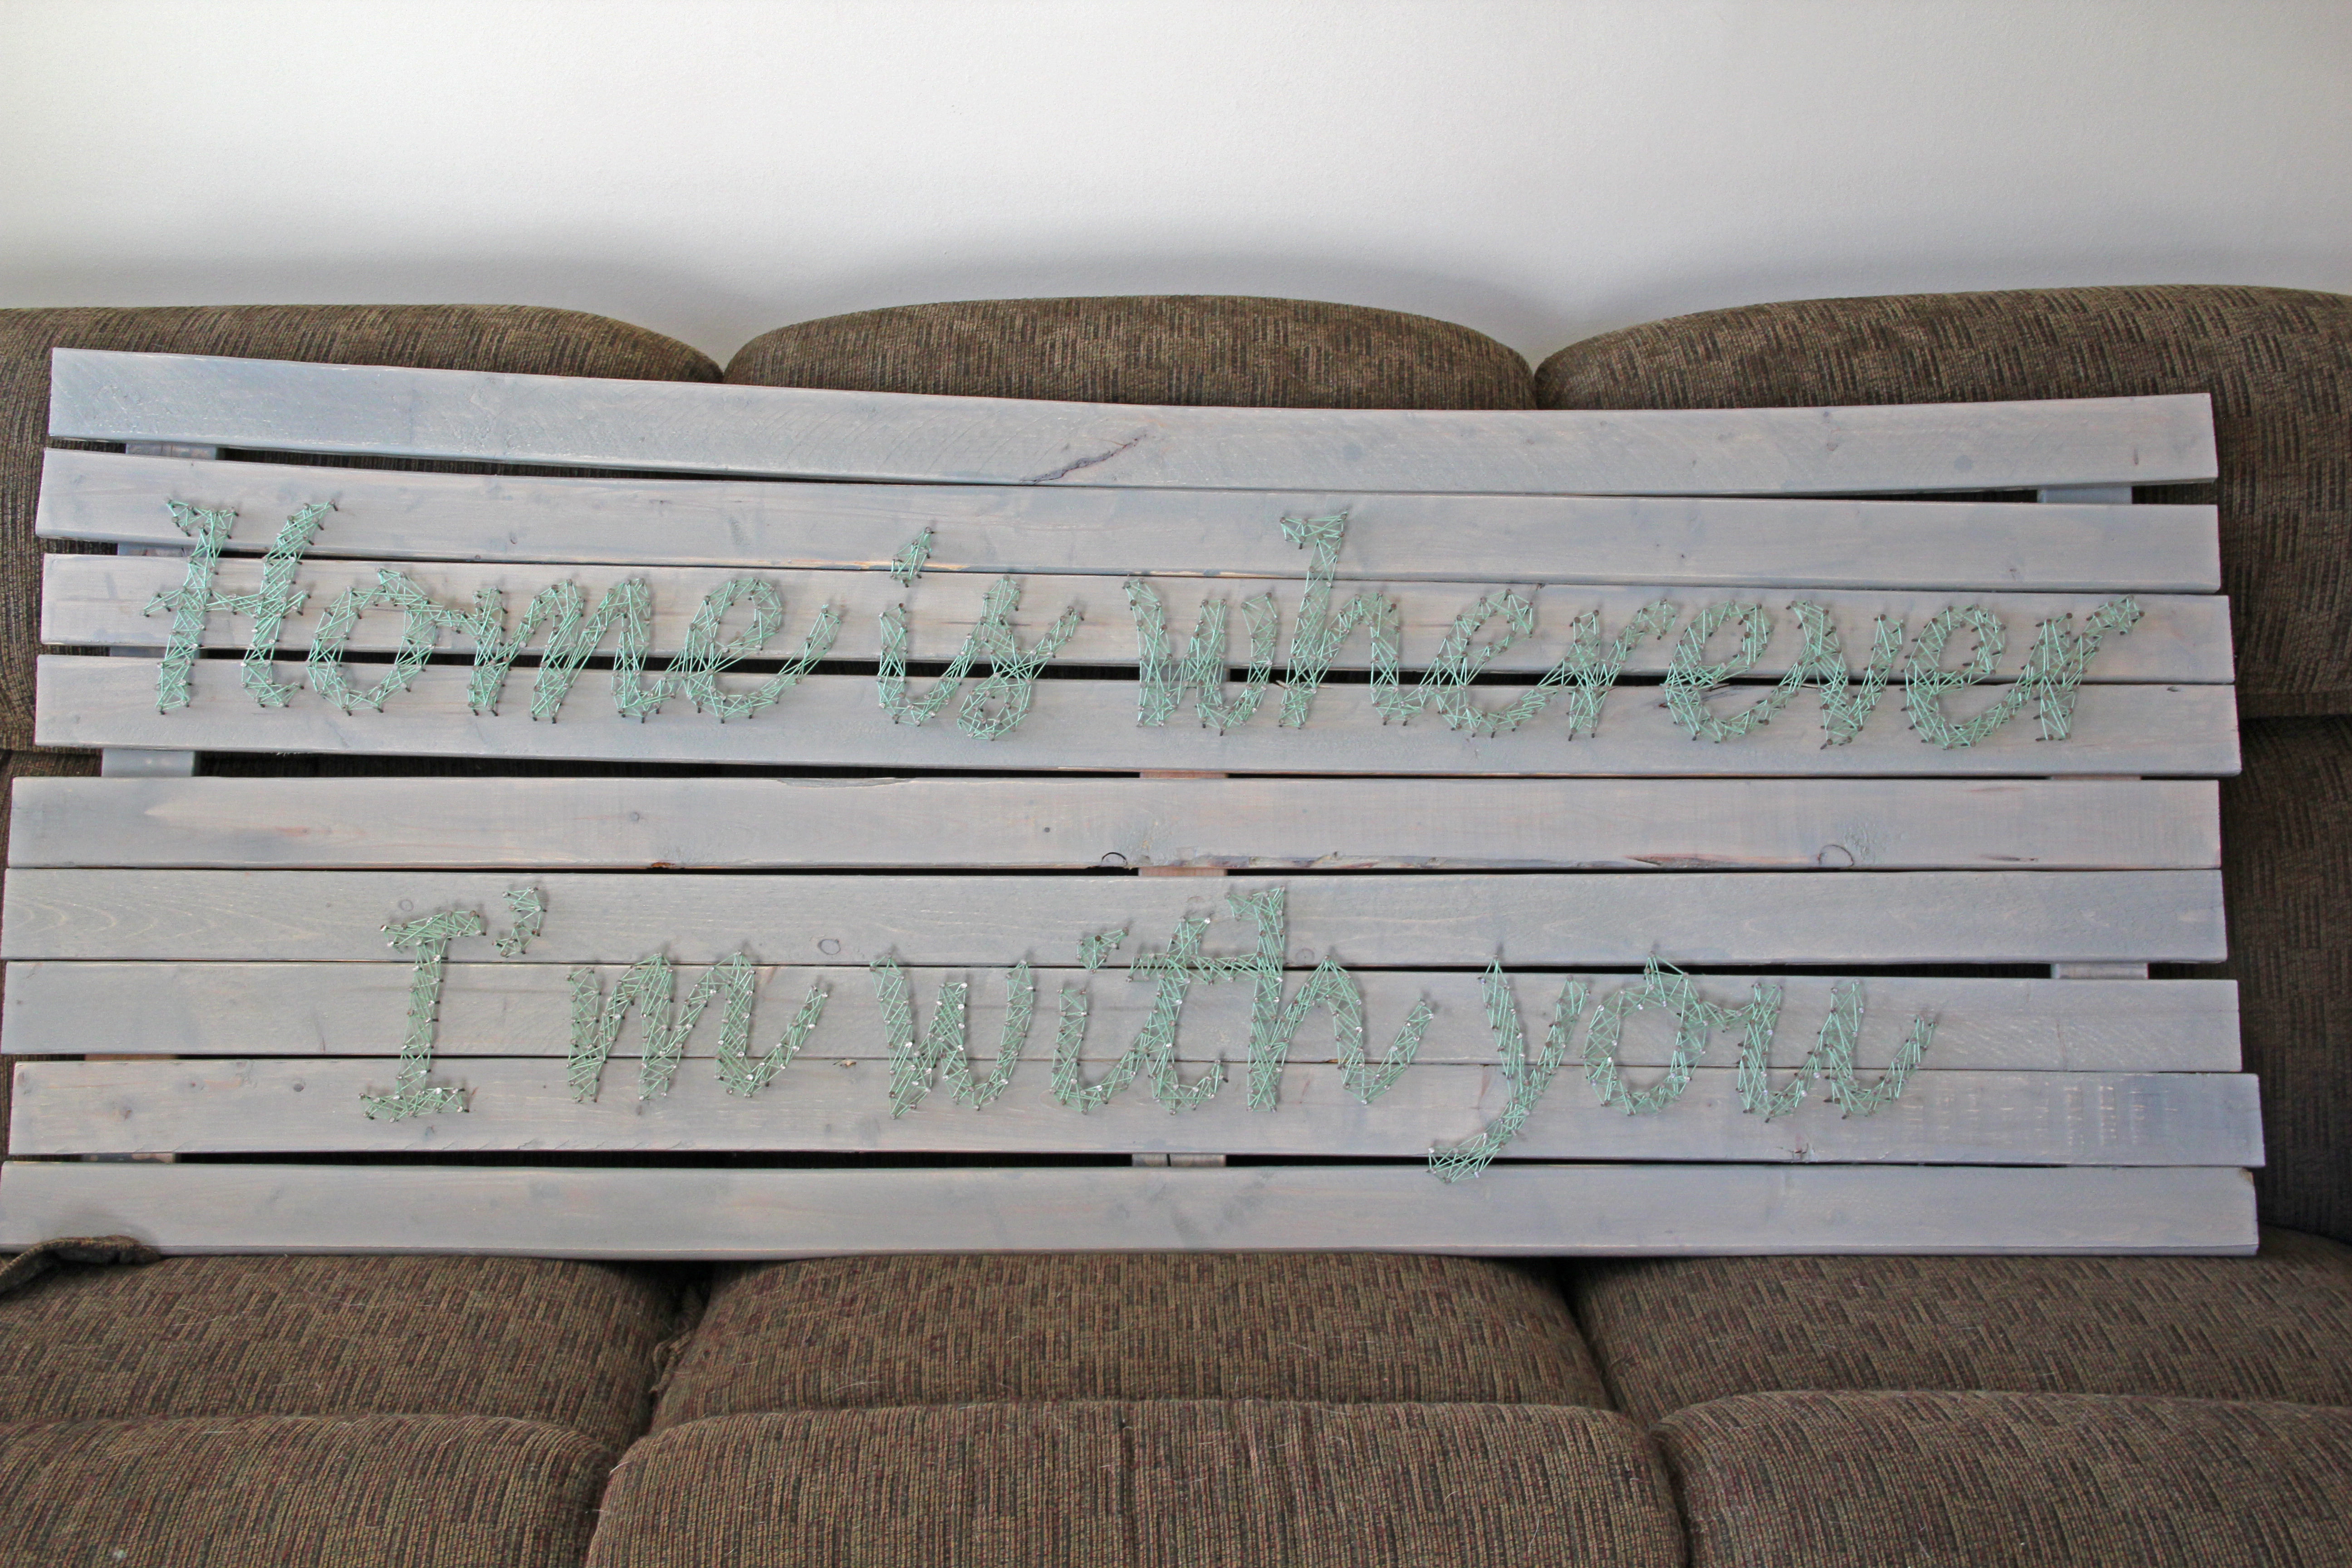
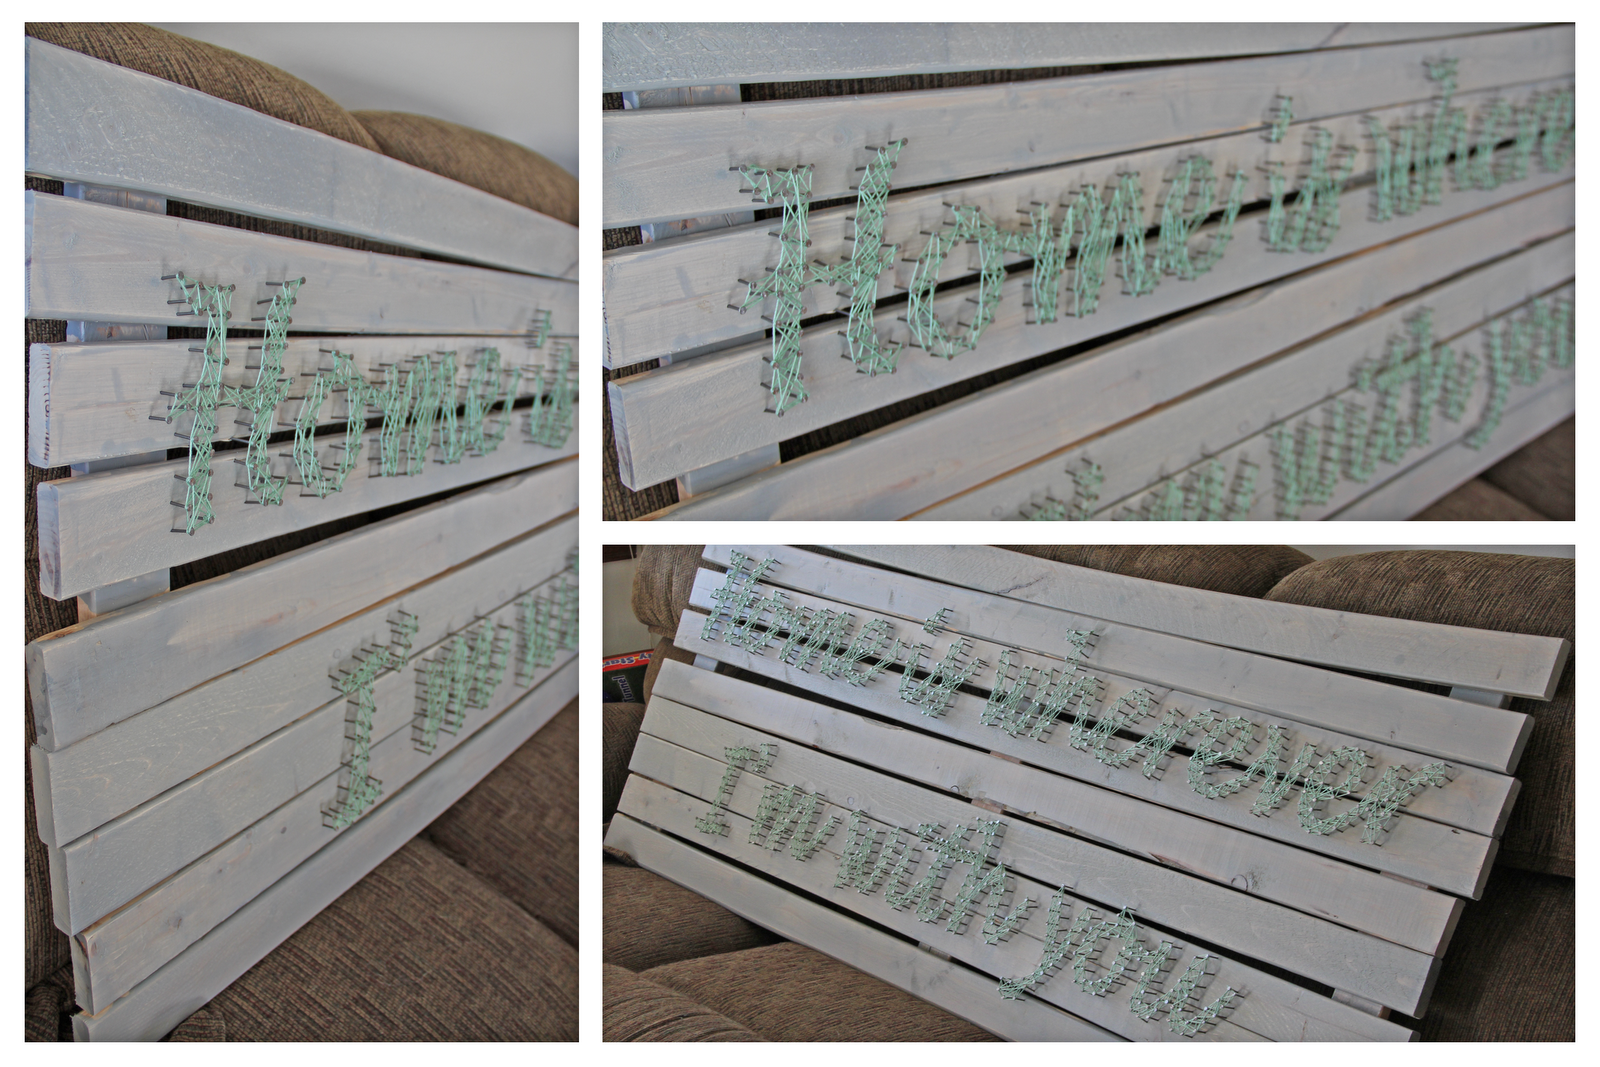
This was also for the to-be-married couple as their wedding gift. They seem to like the rustic chic/unfinished look and had posted this and this on their pinterest page, so I decided to merge the two and have a go at it.
First you have to decide your size. This was 2’H x 5’W. I then headed to Home Depot and scavenged the 75% off bin for some boards that would have the stressed/imperfect feel for the background. I used the same grey stain I had made for their wine crate so that it would match if they ended up getting placed in the same room.
The making of the frame was pretty simple. Don’t make it perfect, leave some spacing, and then screw that sucker down (I screwed from the back so it wouldn’t draw your eye). You can stain before or after, depending on what you’re looking for.
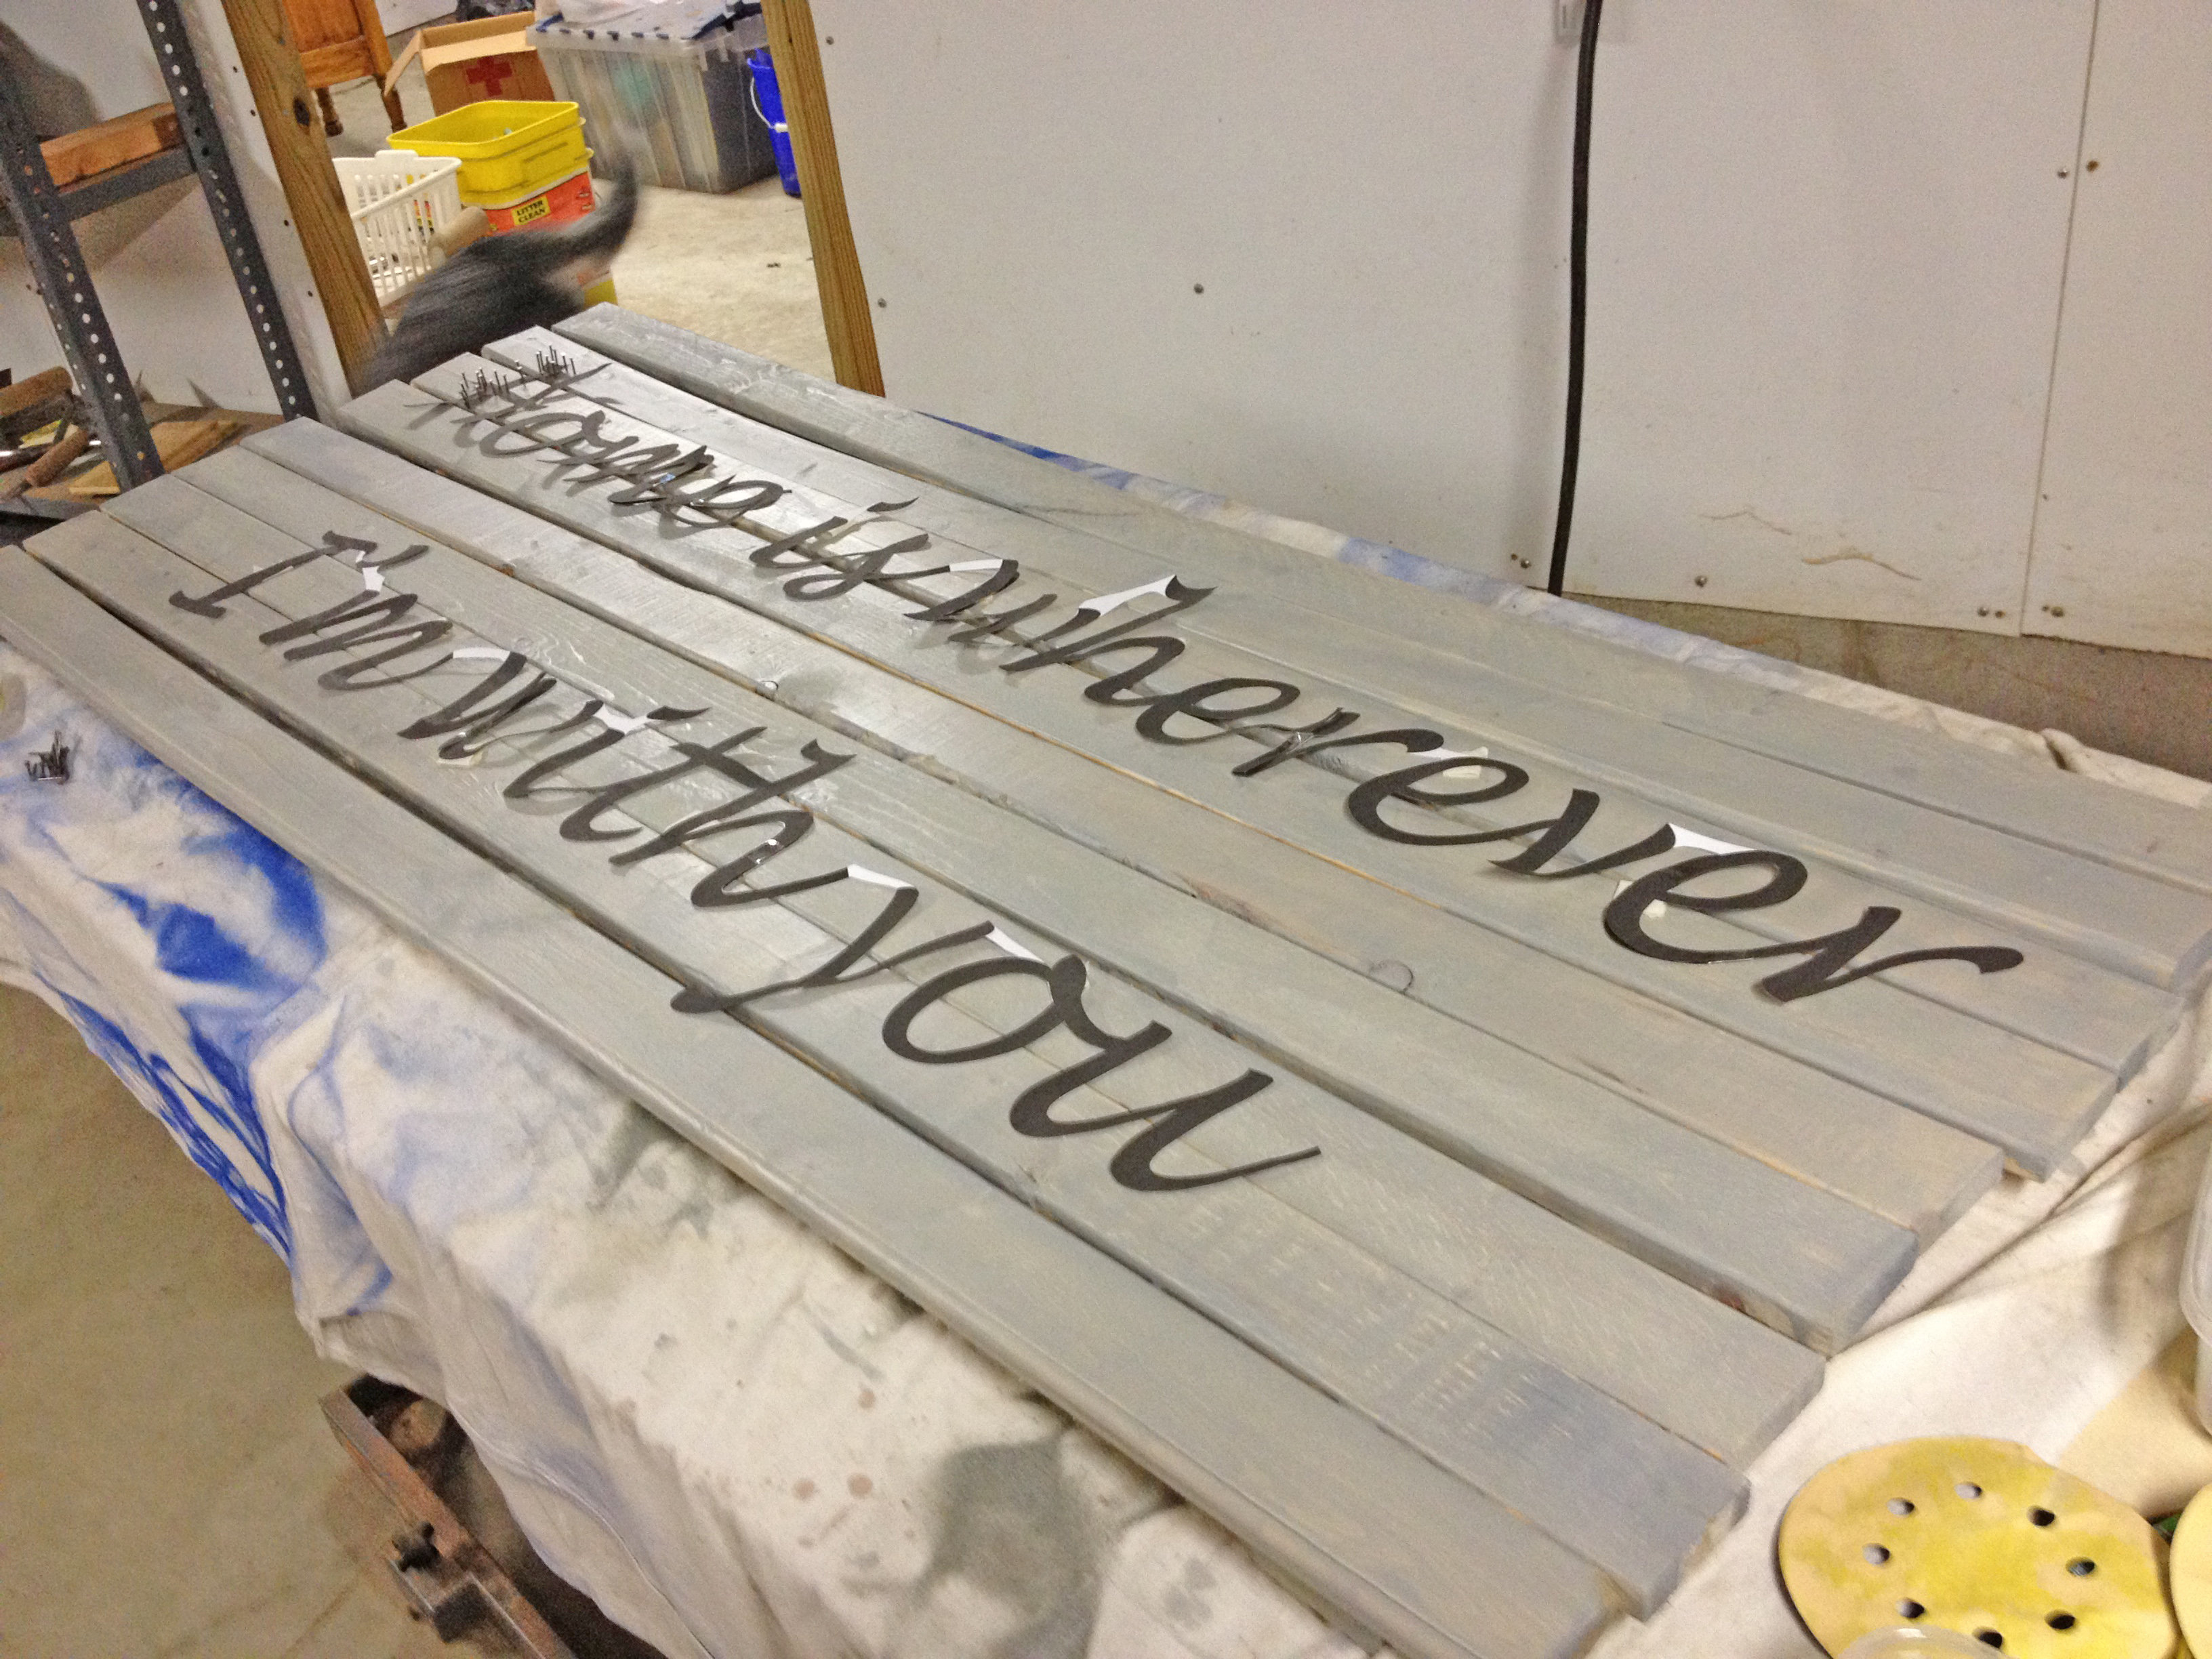
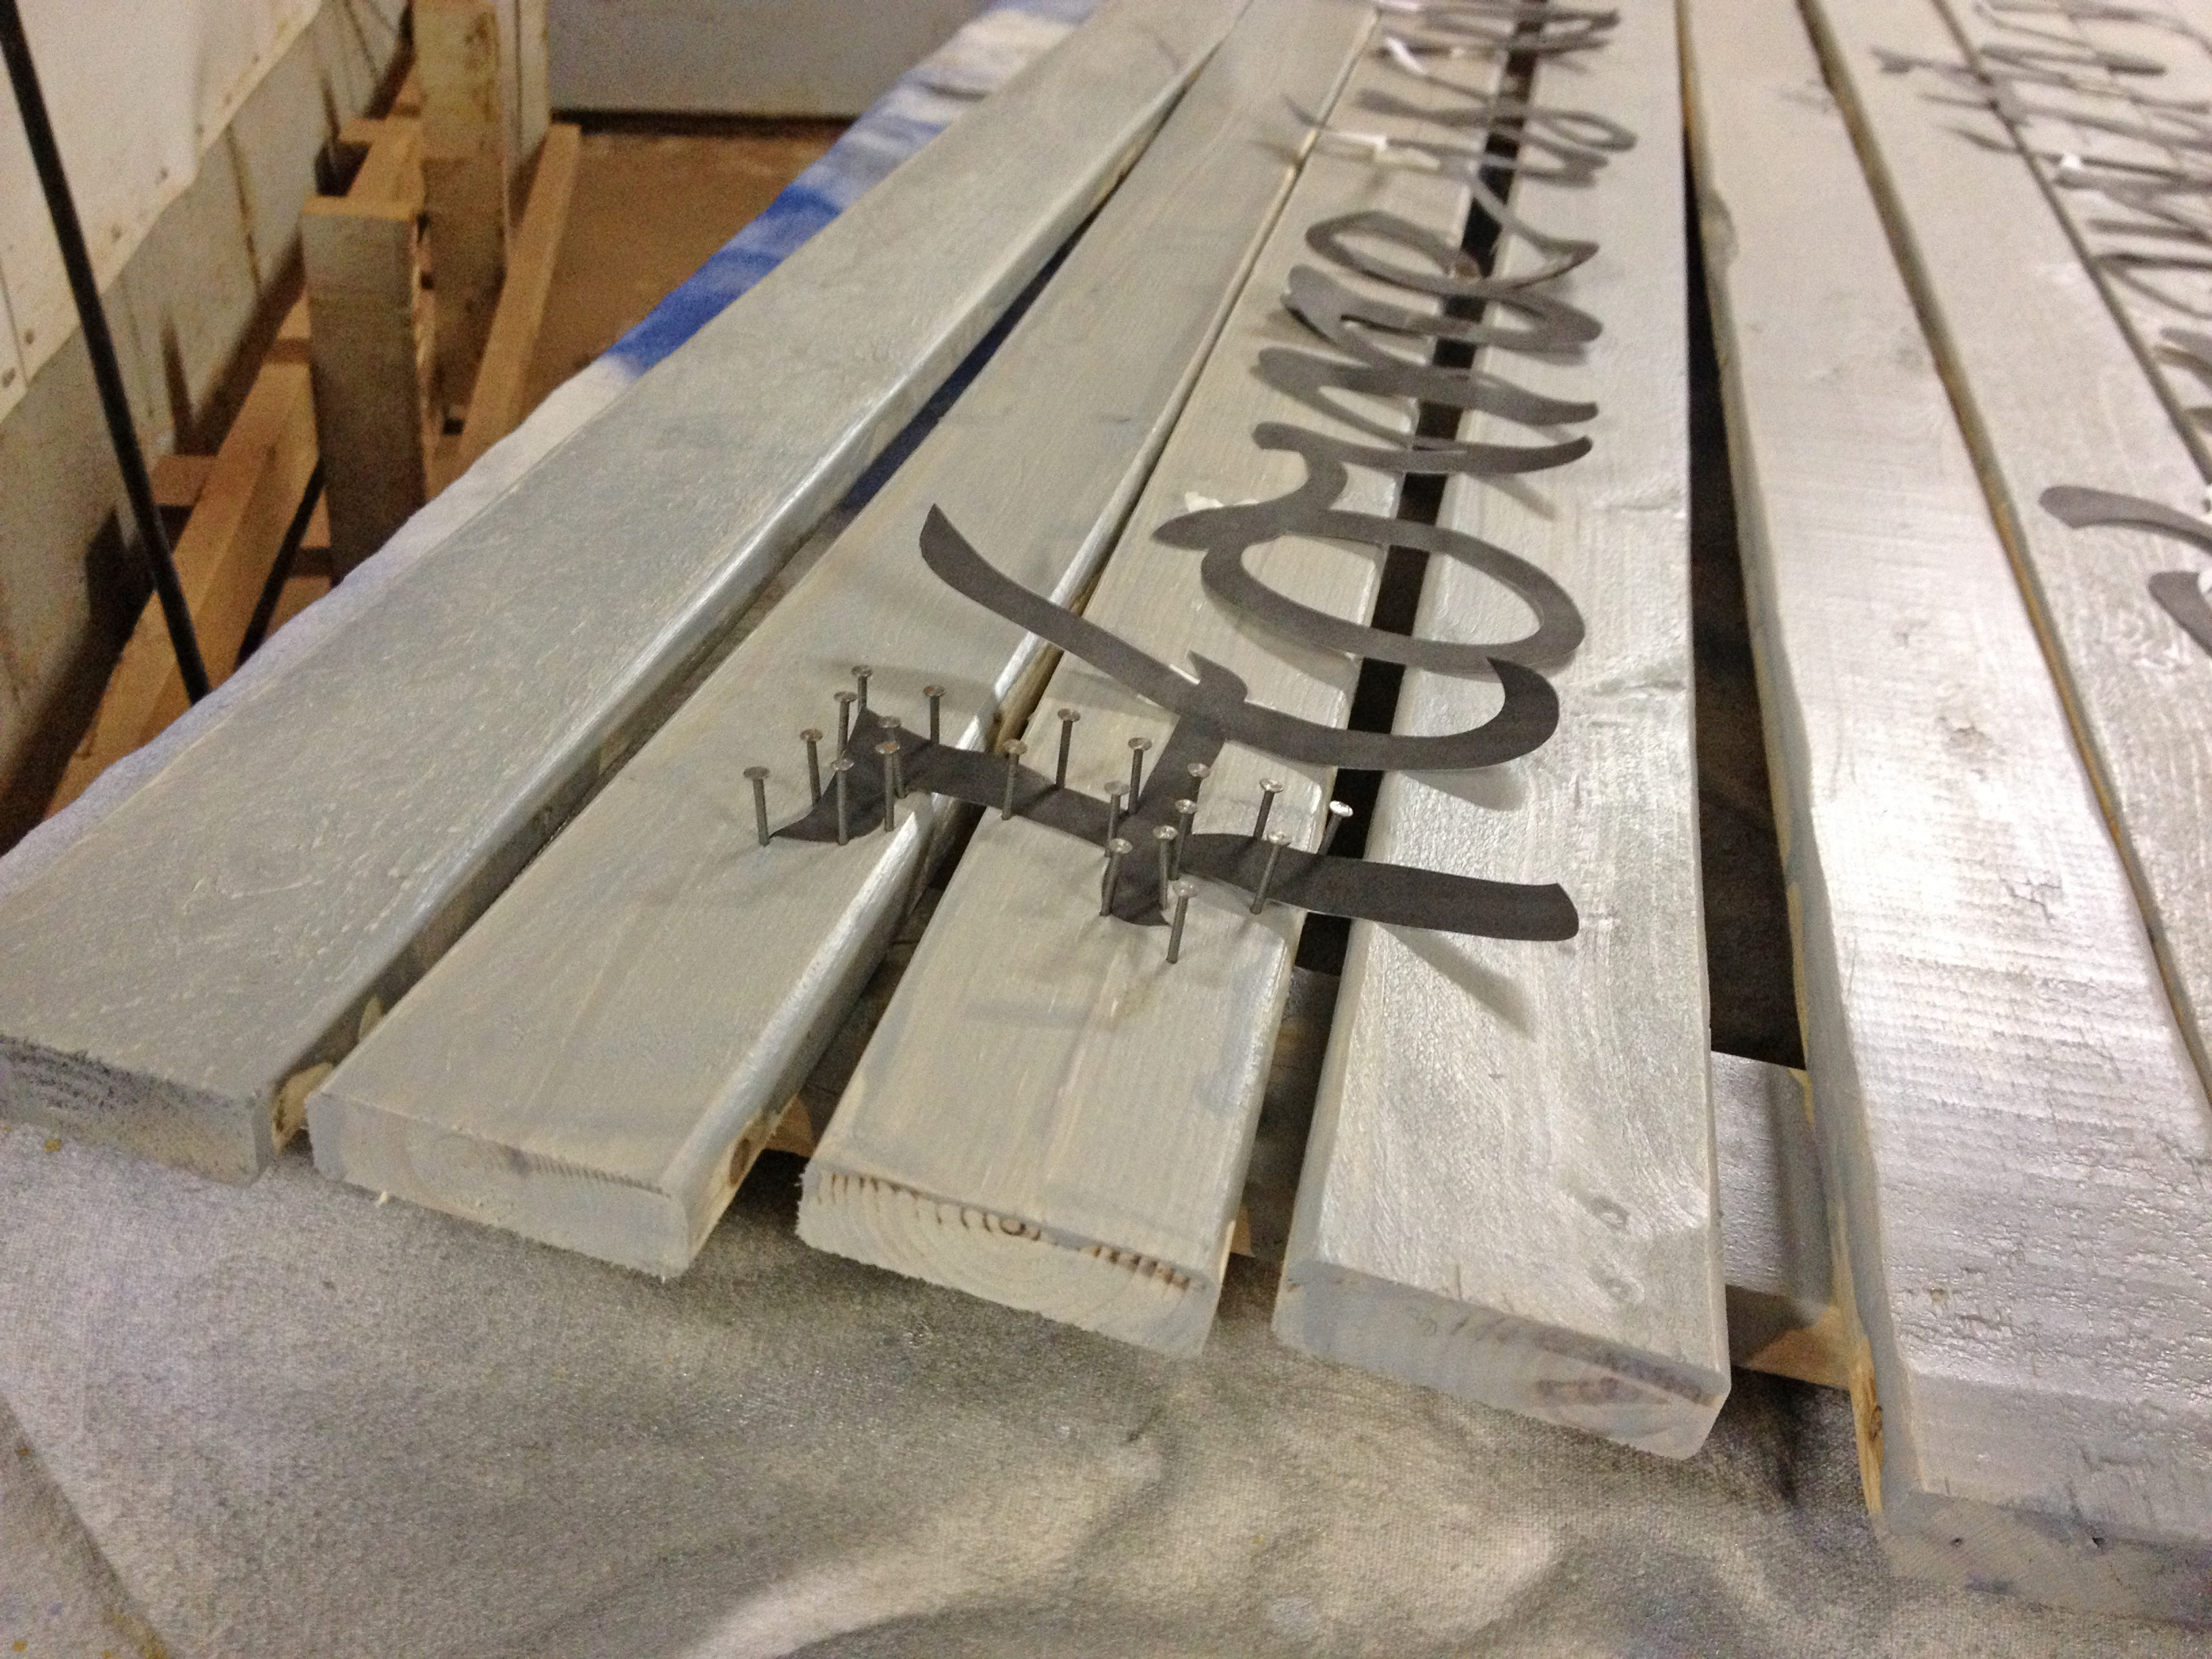
Then comes the hard part. I printed out the phrase I wanted, X-acto’d that out, taped it together, and then layed it on the dried frame. Taped it down in a couple spots, and started hammering away. I used some old brad nails. You could really use whatever, but mine had a bit of a head to them, which helped hold the yarn down in place.
And hammered. And hammered. And hammered.
I actually tested out the yarn stringing process on the H after I first got it hammered, to ensure I had a good plan of attack. I then would switch back and forth from hammering to stringing when I got a word or a sizeable amount of letters done.