The projects begin: #thisoldhouse bathroom
As most of you who follow along on twitter or instagram know, the first major project has begun at #ThisOldHouse. The (second floor) full bathroom has officially started demo/reno. Before I even bought the house, I’d had visions of what it would turn into.
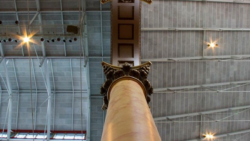
This is what I started with:

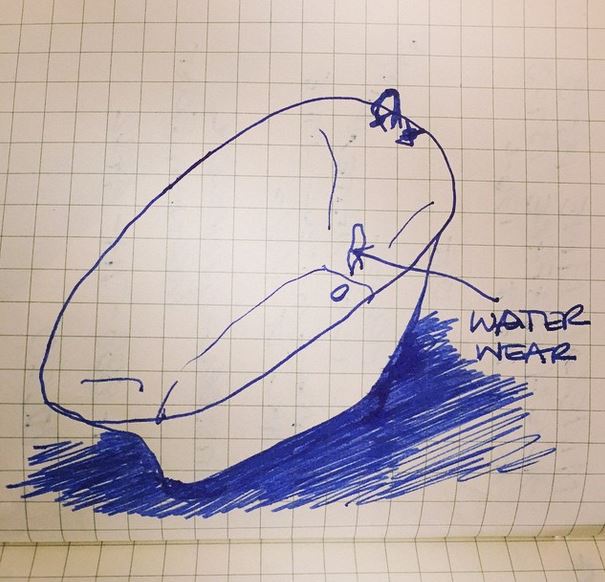
The cast iron tub is original and appears to have been repainted in 1984 (even the renovation is older than me) based on some finger painting on the bottom of it. I knew there was no way I was going to get rid of it and began the search for sourcing some porcelain paint to fix it. It has a wear spot, like so:
Simple enough (or so I say now), but still one more thing to fix.
This bathroom will also hold the future washer and dryer, which is why it is project numero uno. As much as driving 40min to my mom’s to do laundry (and get a free dinner) is well worth it, my future roommate won’t feel the same way and at some point I won’t either. So until this project is done, #thisoldhouse is operating without a w/d.
How do you approach a project like this?
Personally, design blogs and Pinterest are my best of friends in these instances. And I sketch a lot. Like A LOT. I had previously made a bathroom board on Pinterest, aptly titled “So Fresh and So Clean” (I know, corny as hell, but roll with it). After I knew my parameters, it was time to go back and curate – and know what more to add. As I mentioned before, I also started sketching bathroom layouts and perspectives to figure out what would work and what wouldn’t.
My first pass before measuring (reason number 48653470968 why measuring is important):
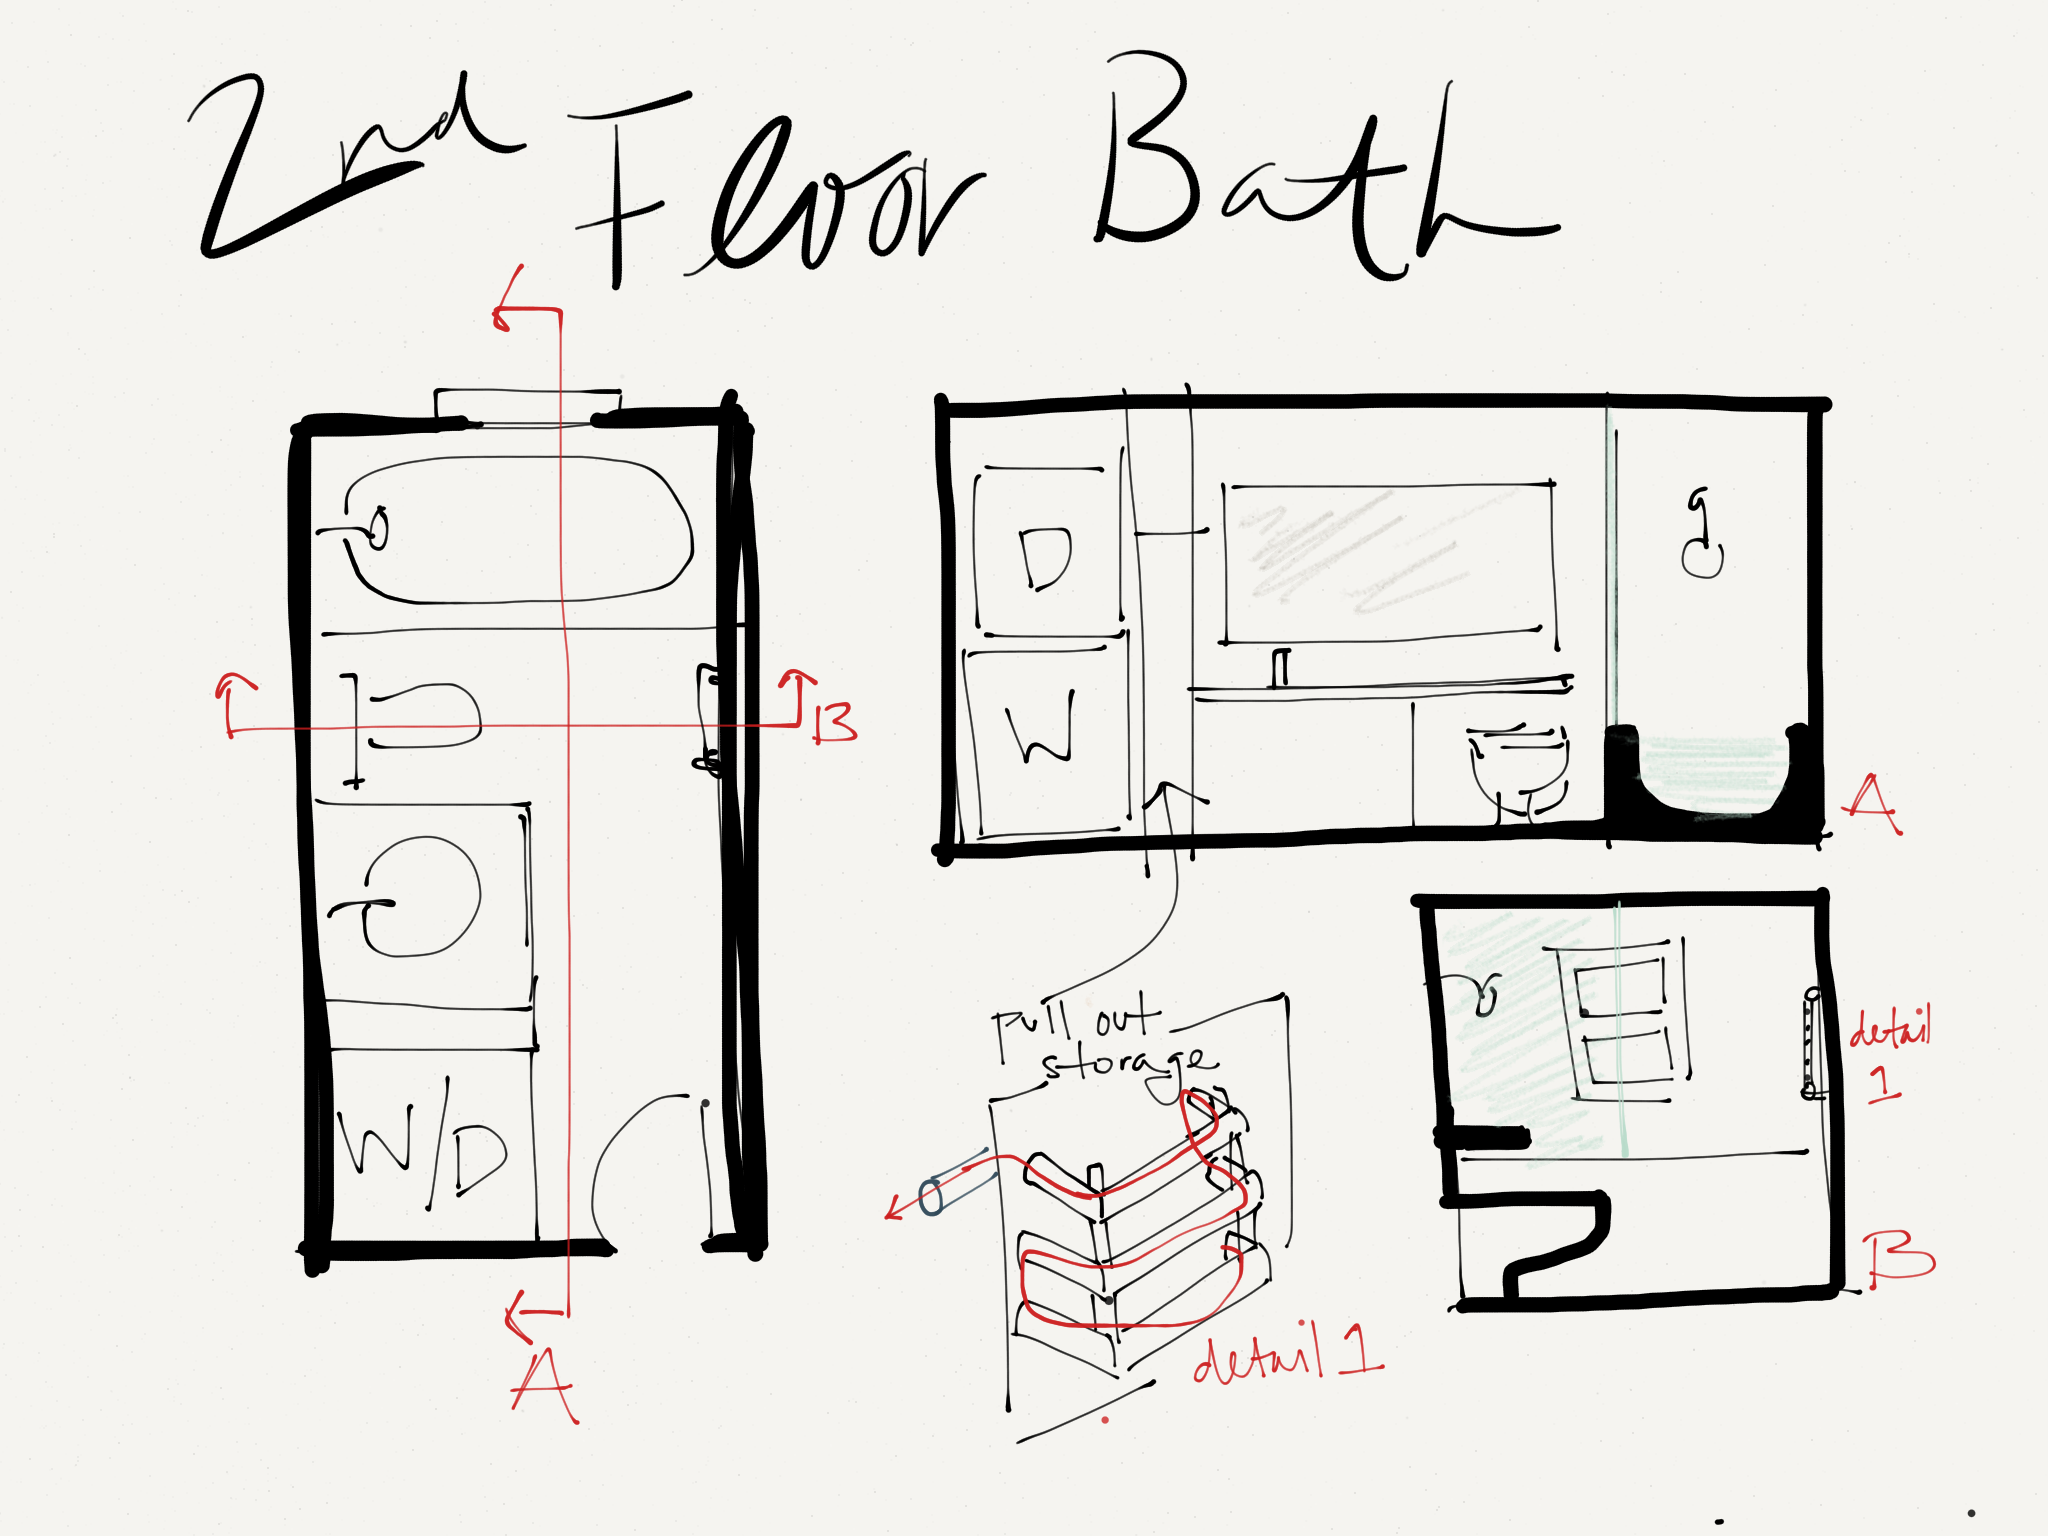
The w/d found a good home (mostly because they don’t fit anywhere else) but the remainder had to be scrapped because of a couple reasons:
- I decided to keep the cast iron tub in here instead of transition it to the (future) master bath.
- The scale and dimensions are all wrong (remember that comment about measuring?)
So back to the drawing board after I ACTUALLY measured the space. And along came more sketches:
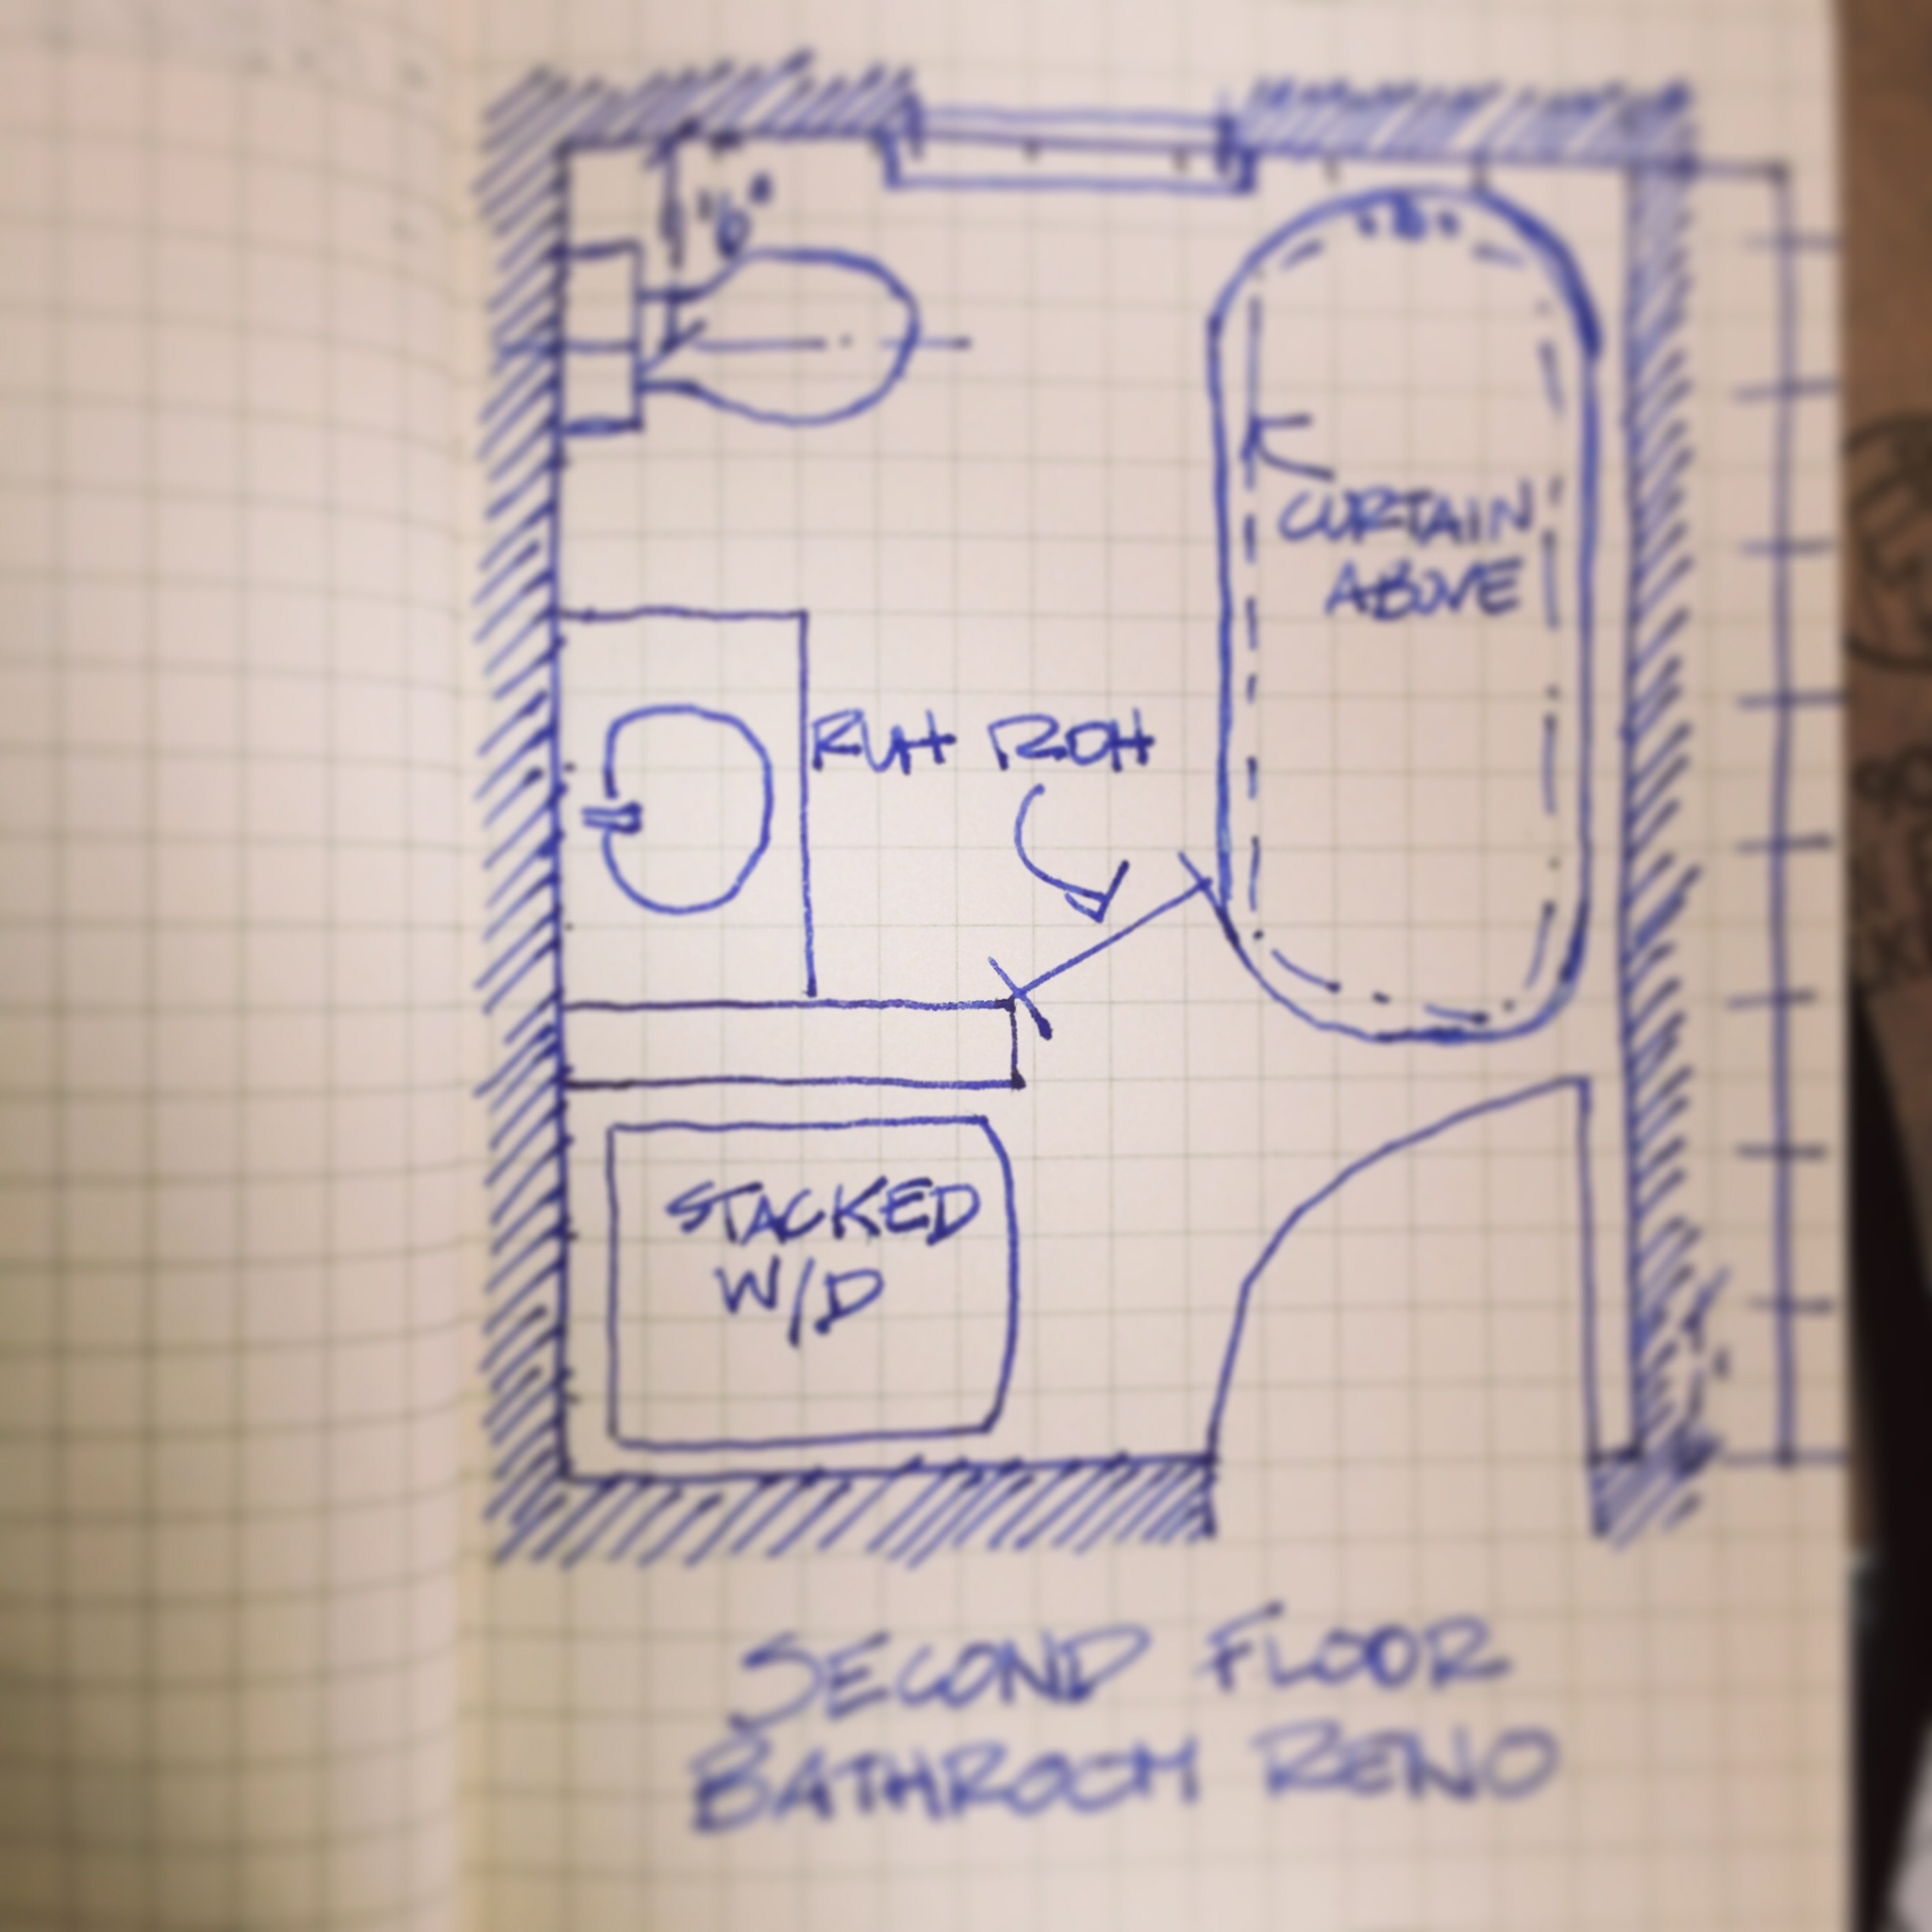
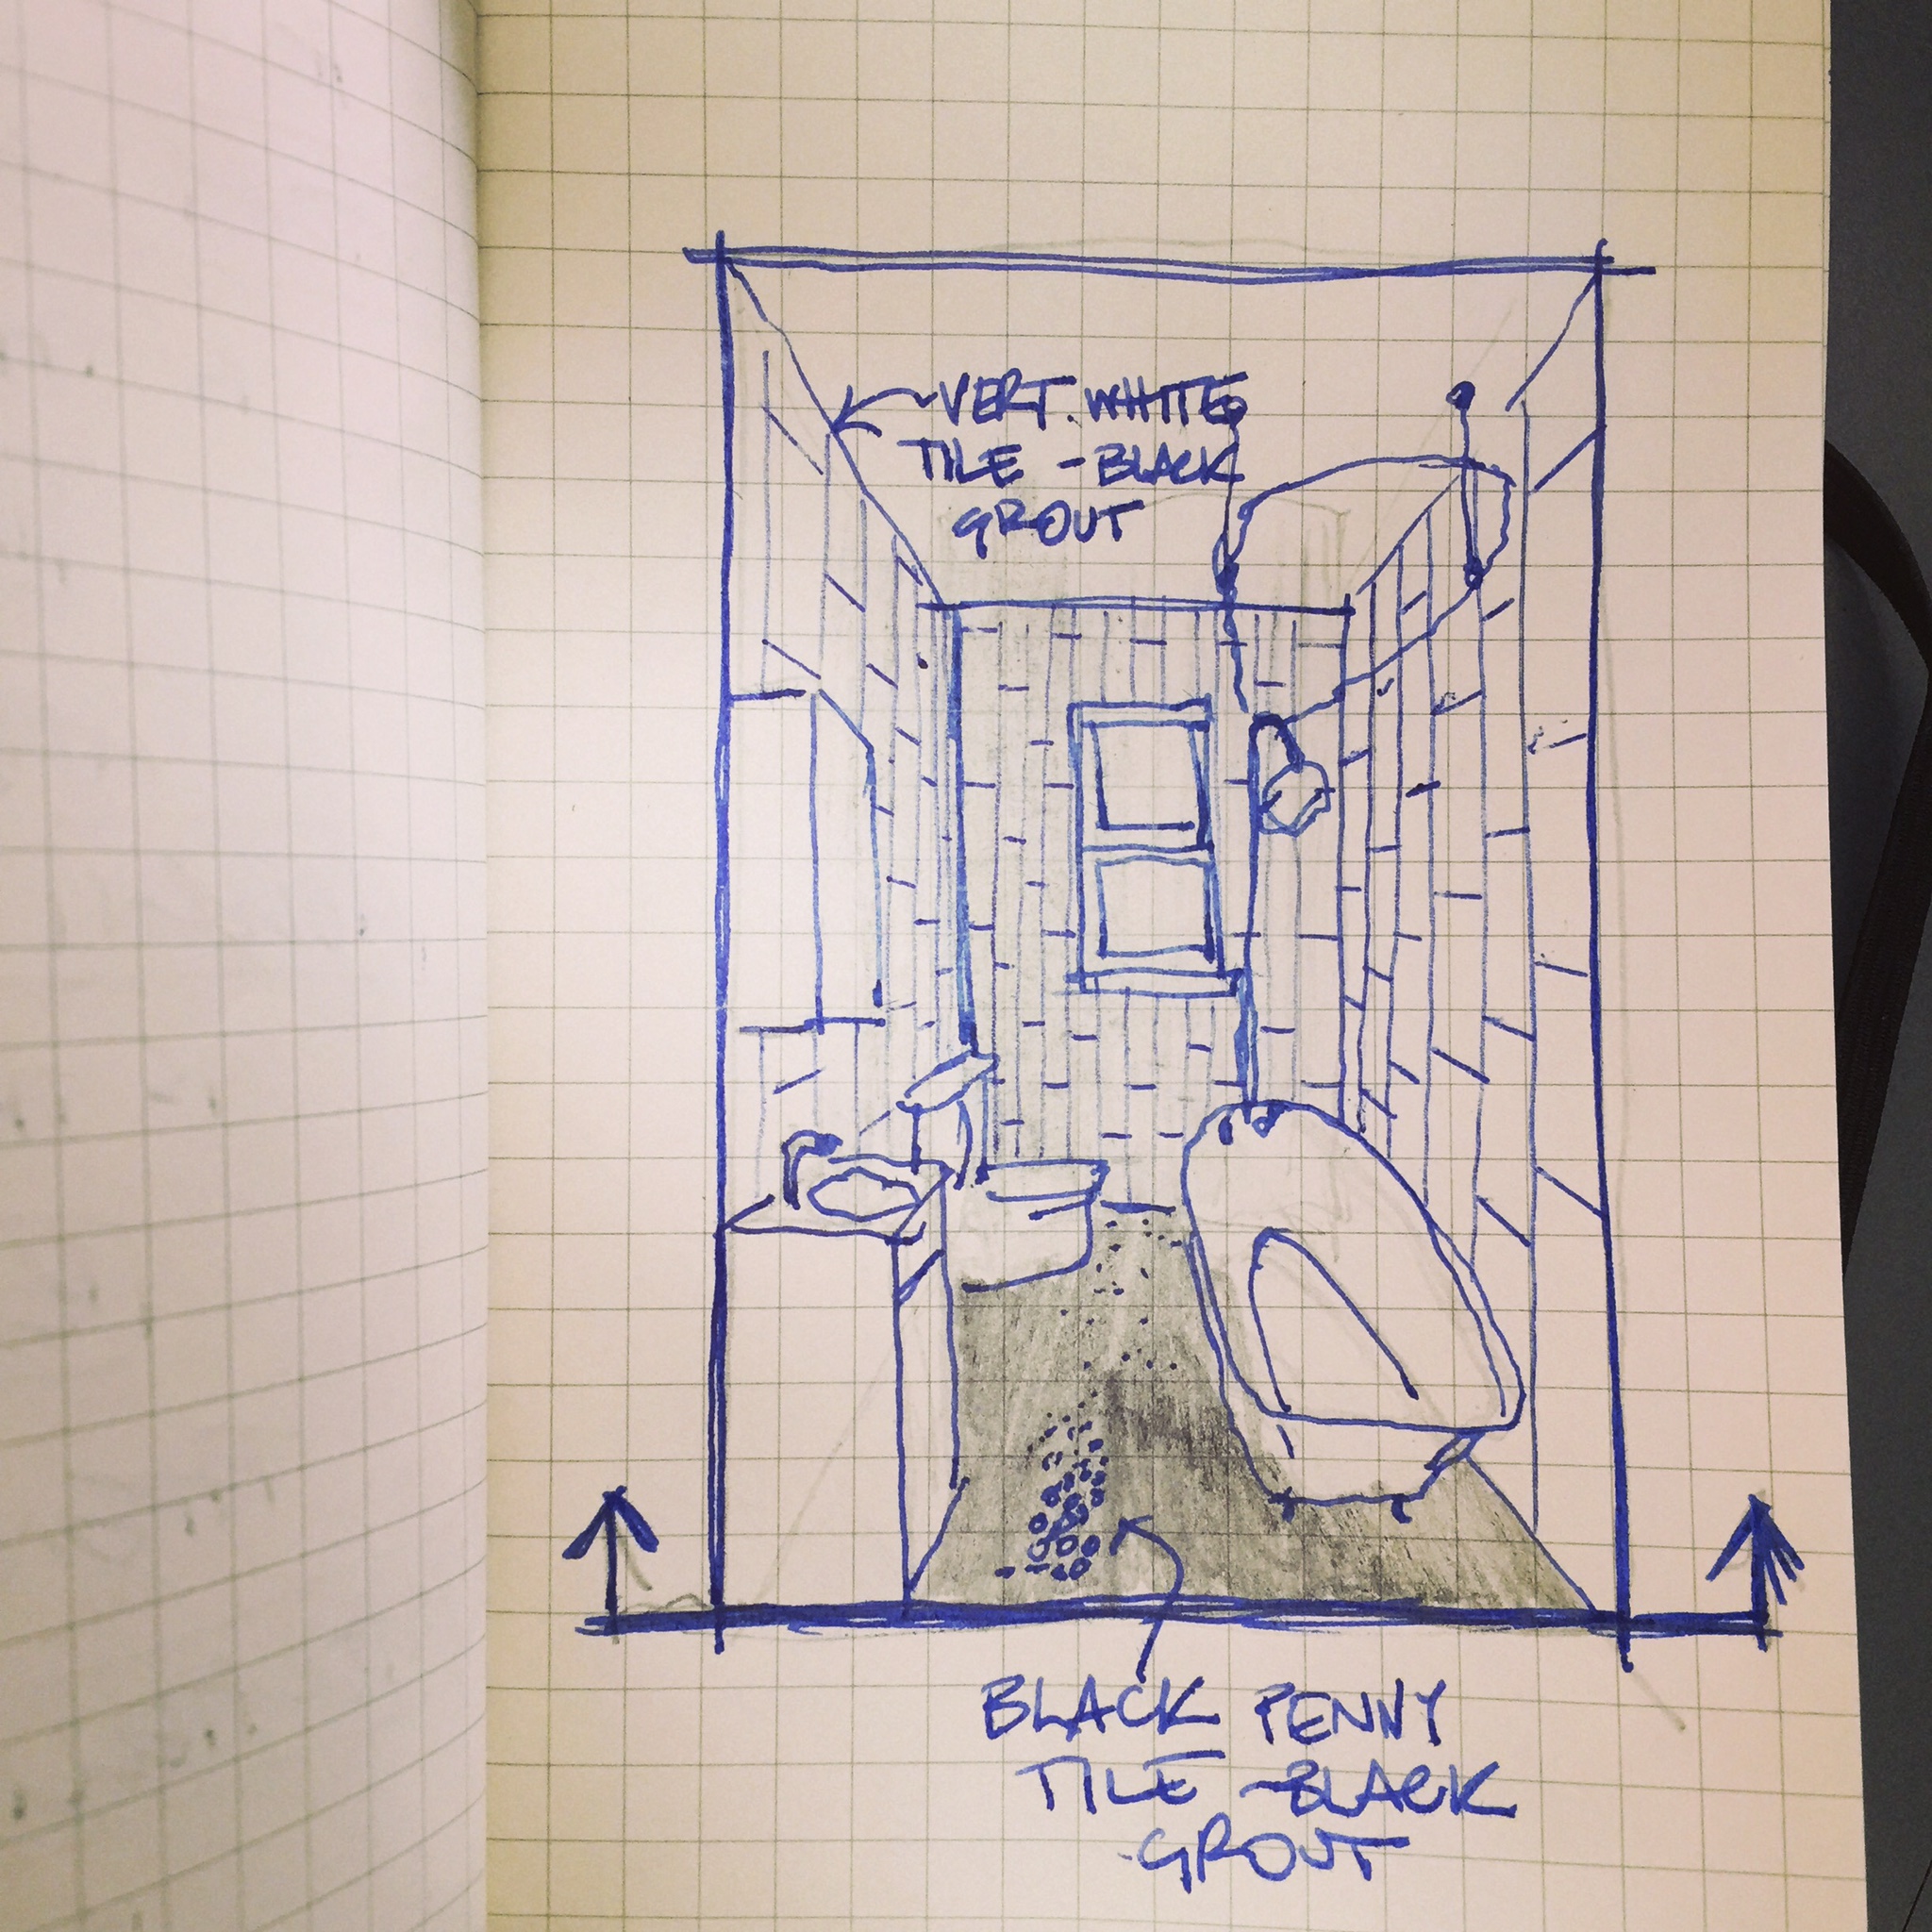
Remember how I mentioned the importance of measuring? The “Ruh roh” comment above got taped on the floor, and ended up with boxes of comparable sizes being stacked to replicate the possible clearance issues in the bathroom.
Now what?
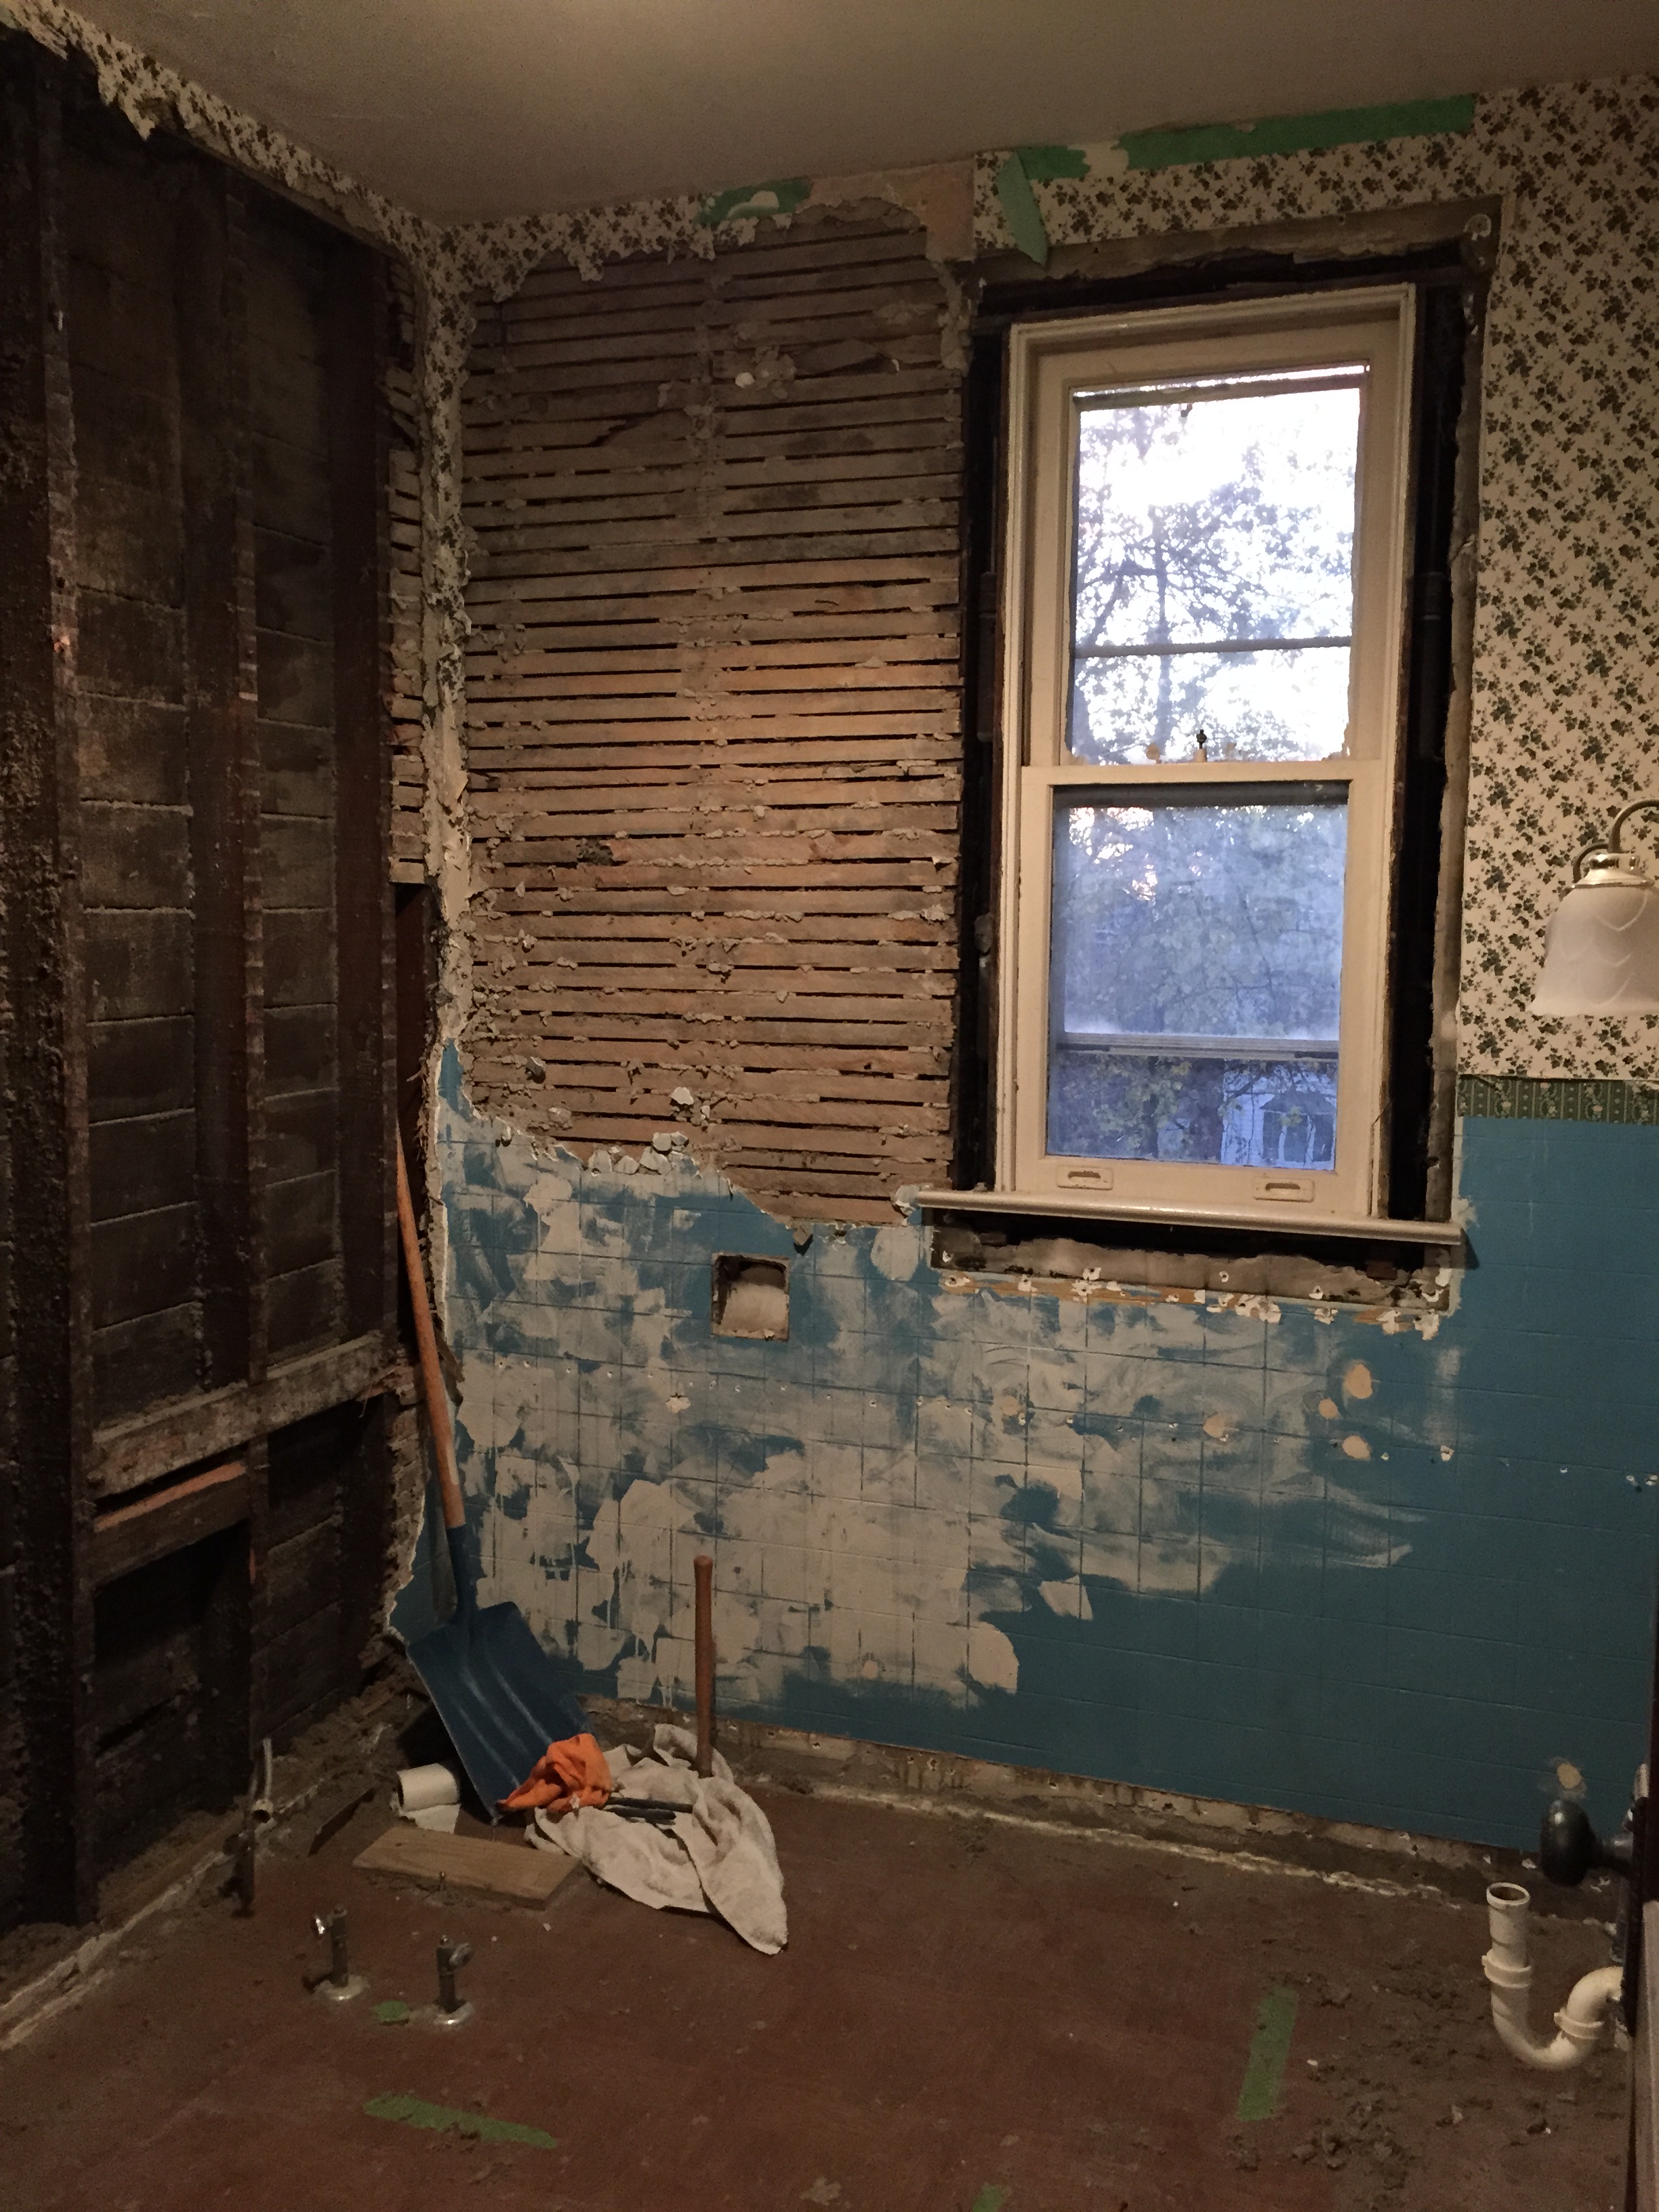
Now is the fun part! Demo. The beadboard on the walls was the first material to come down. Behind it we found plaster that had been imprinted while still wet to look like tile, among other crazy finds.
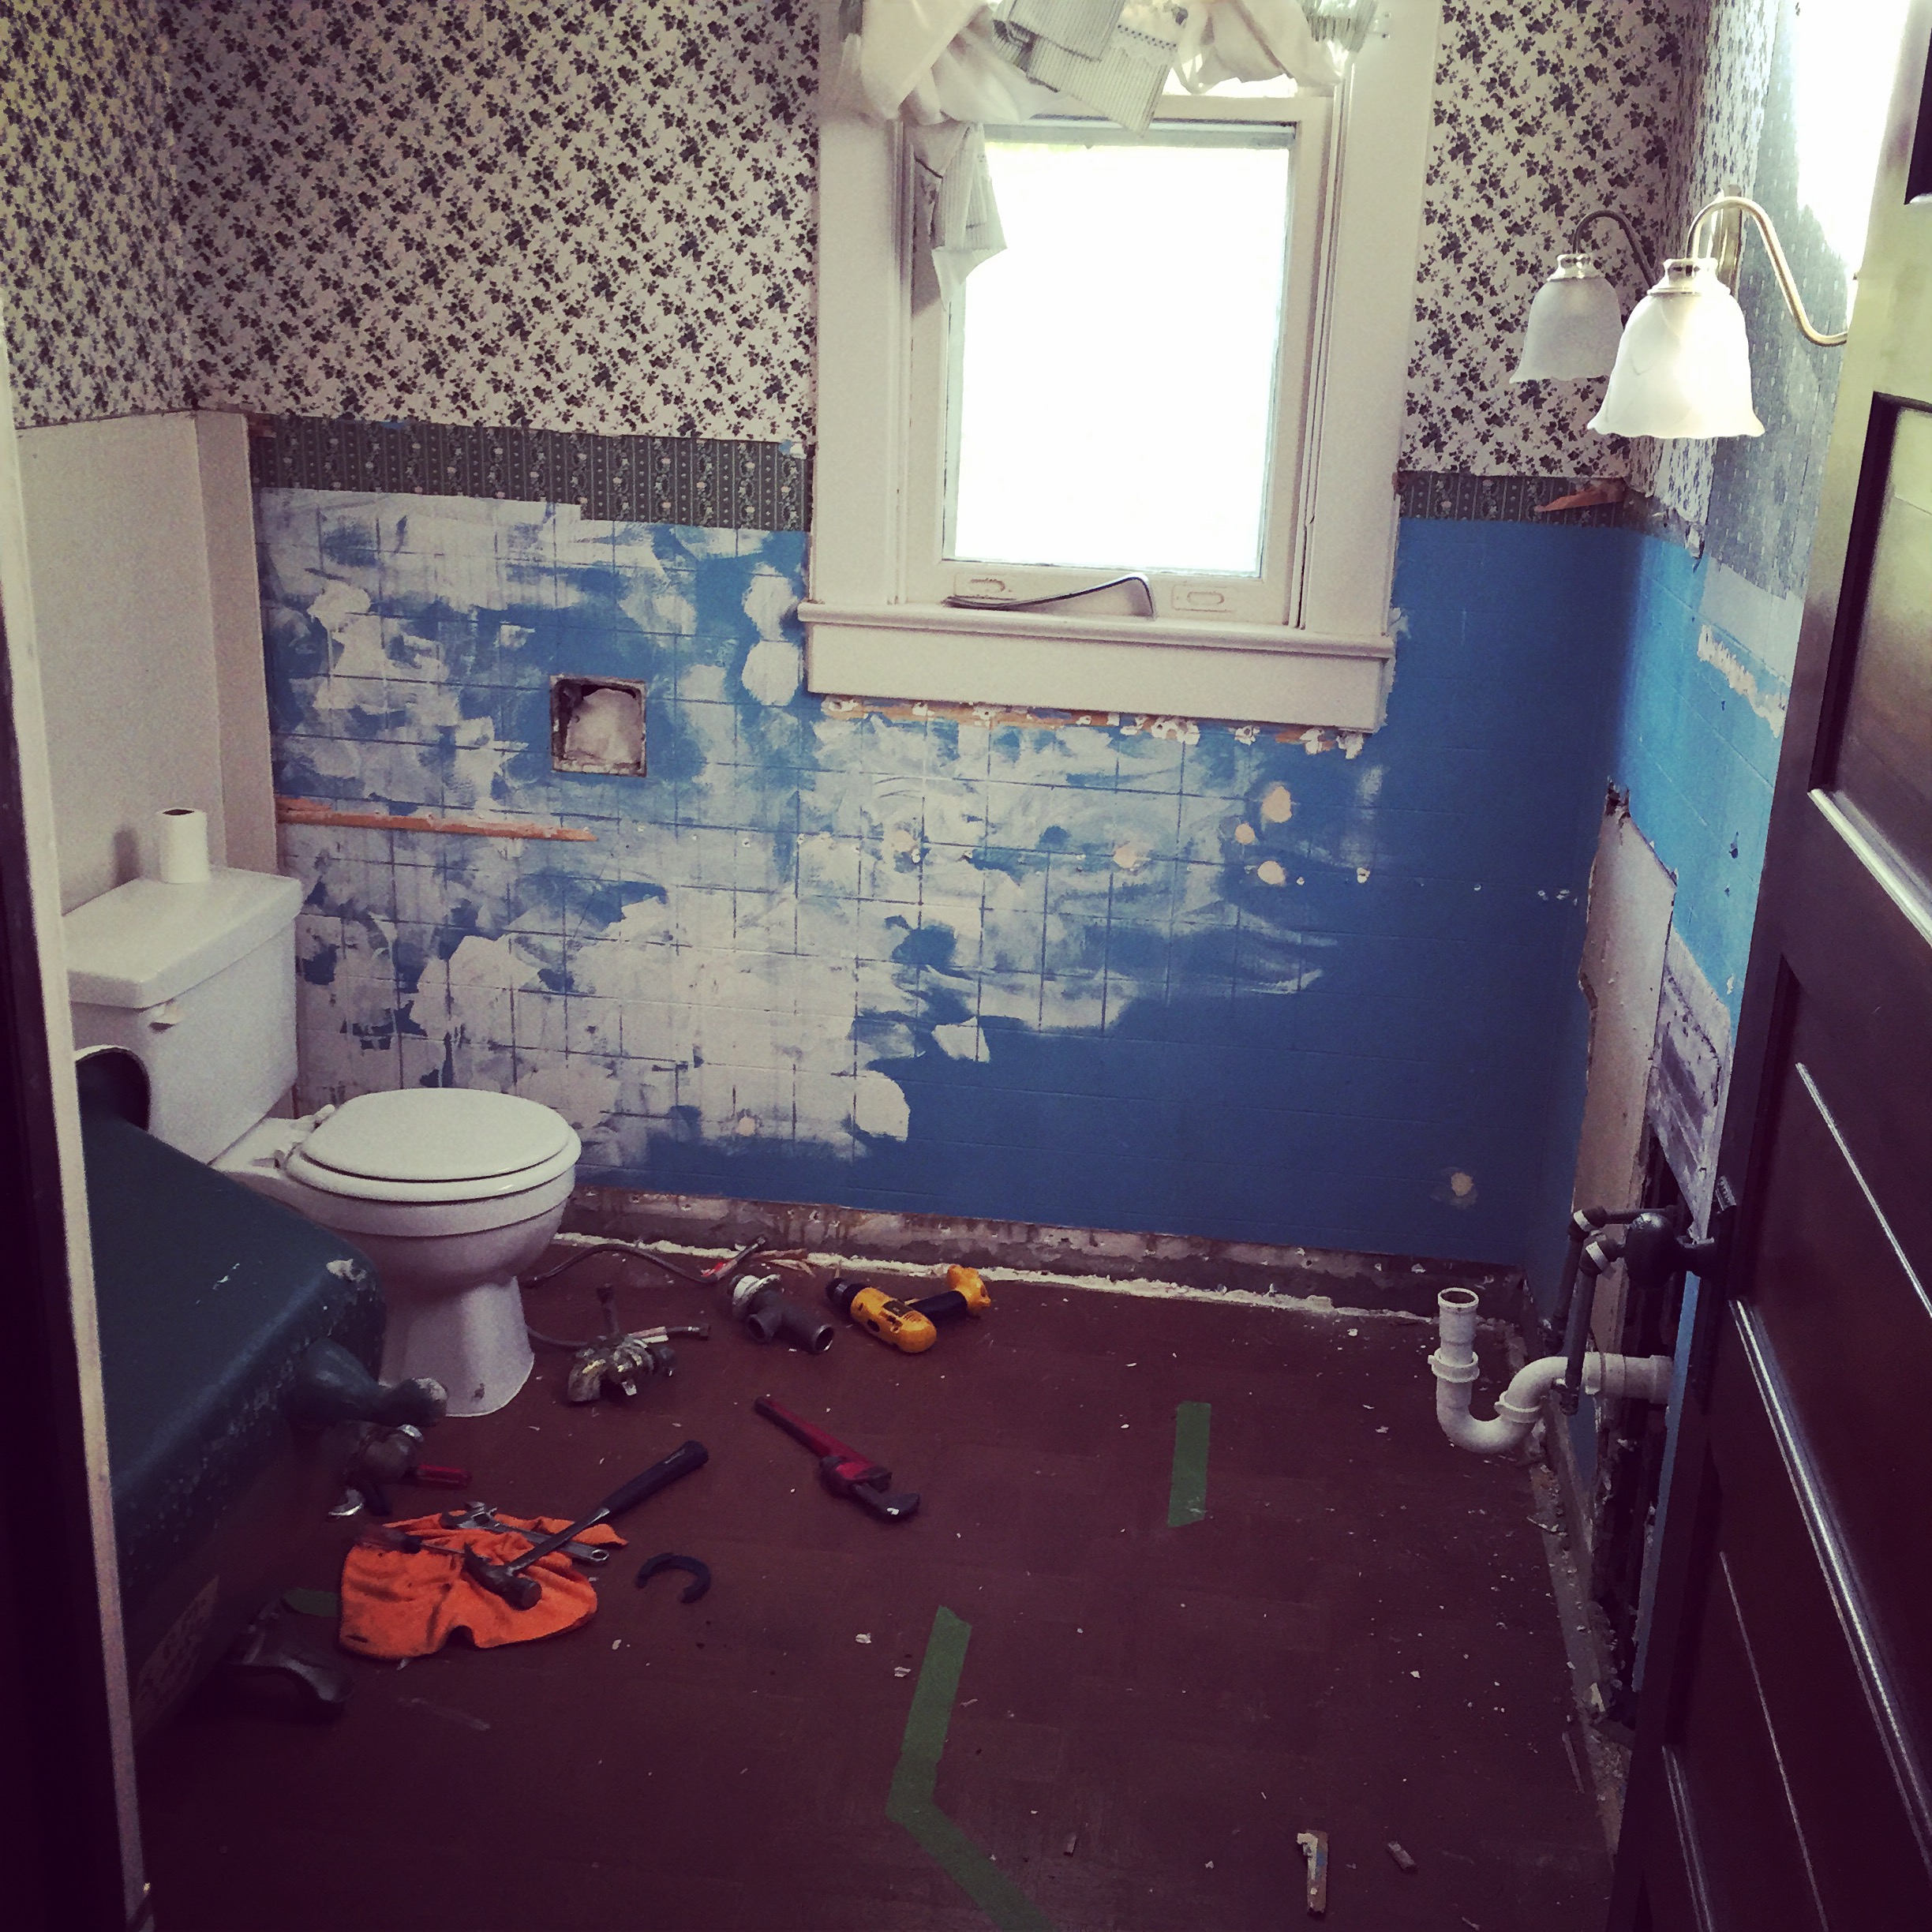
[Before you remove anything, make sure the plumbing connecting to the appliances and fixtures are off. Demo may feel like a play park wonderland, but you DON’T want it to be a water park.] We got the toilet (waiting to go to salvage) and cast iron tub (waiting to be refinished) out of the space and started carefully removing the trim from around the windows and the inner trim around the door before beginning the processes of plaster removal. Why carefully?
- Because we want to re-use it. It’s solid wood!
- Because the original weights behind the windows are still in tact and working. Be vewwwy, vewwwy careful. A snapped rope is a setback of frustrating proportions.
I’m lucky to have handy family close by to help with this demo. I even caught one in action the other day:
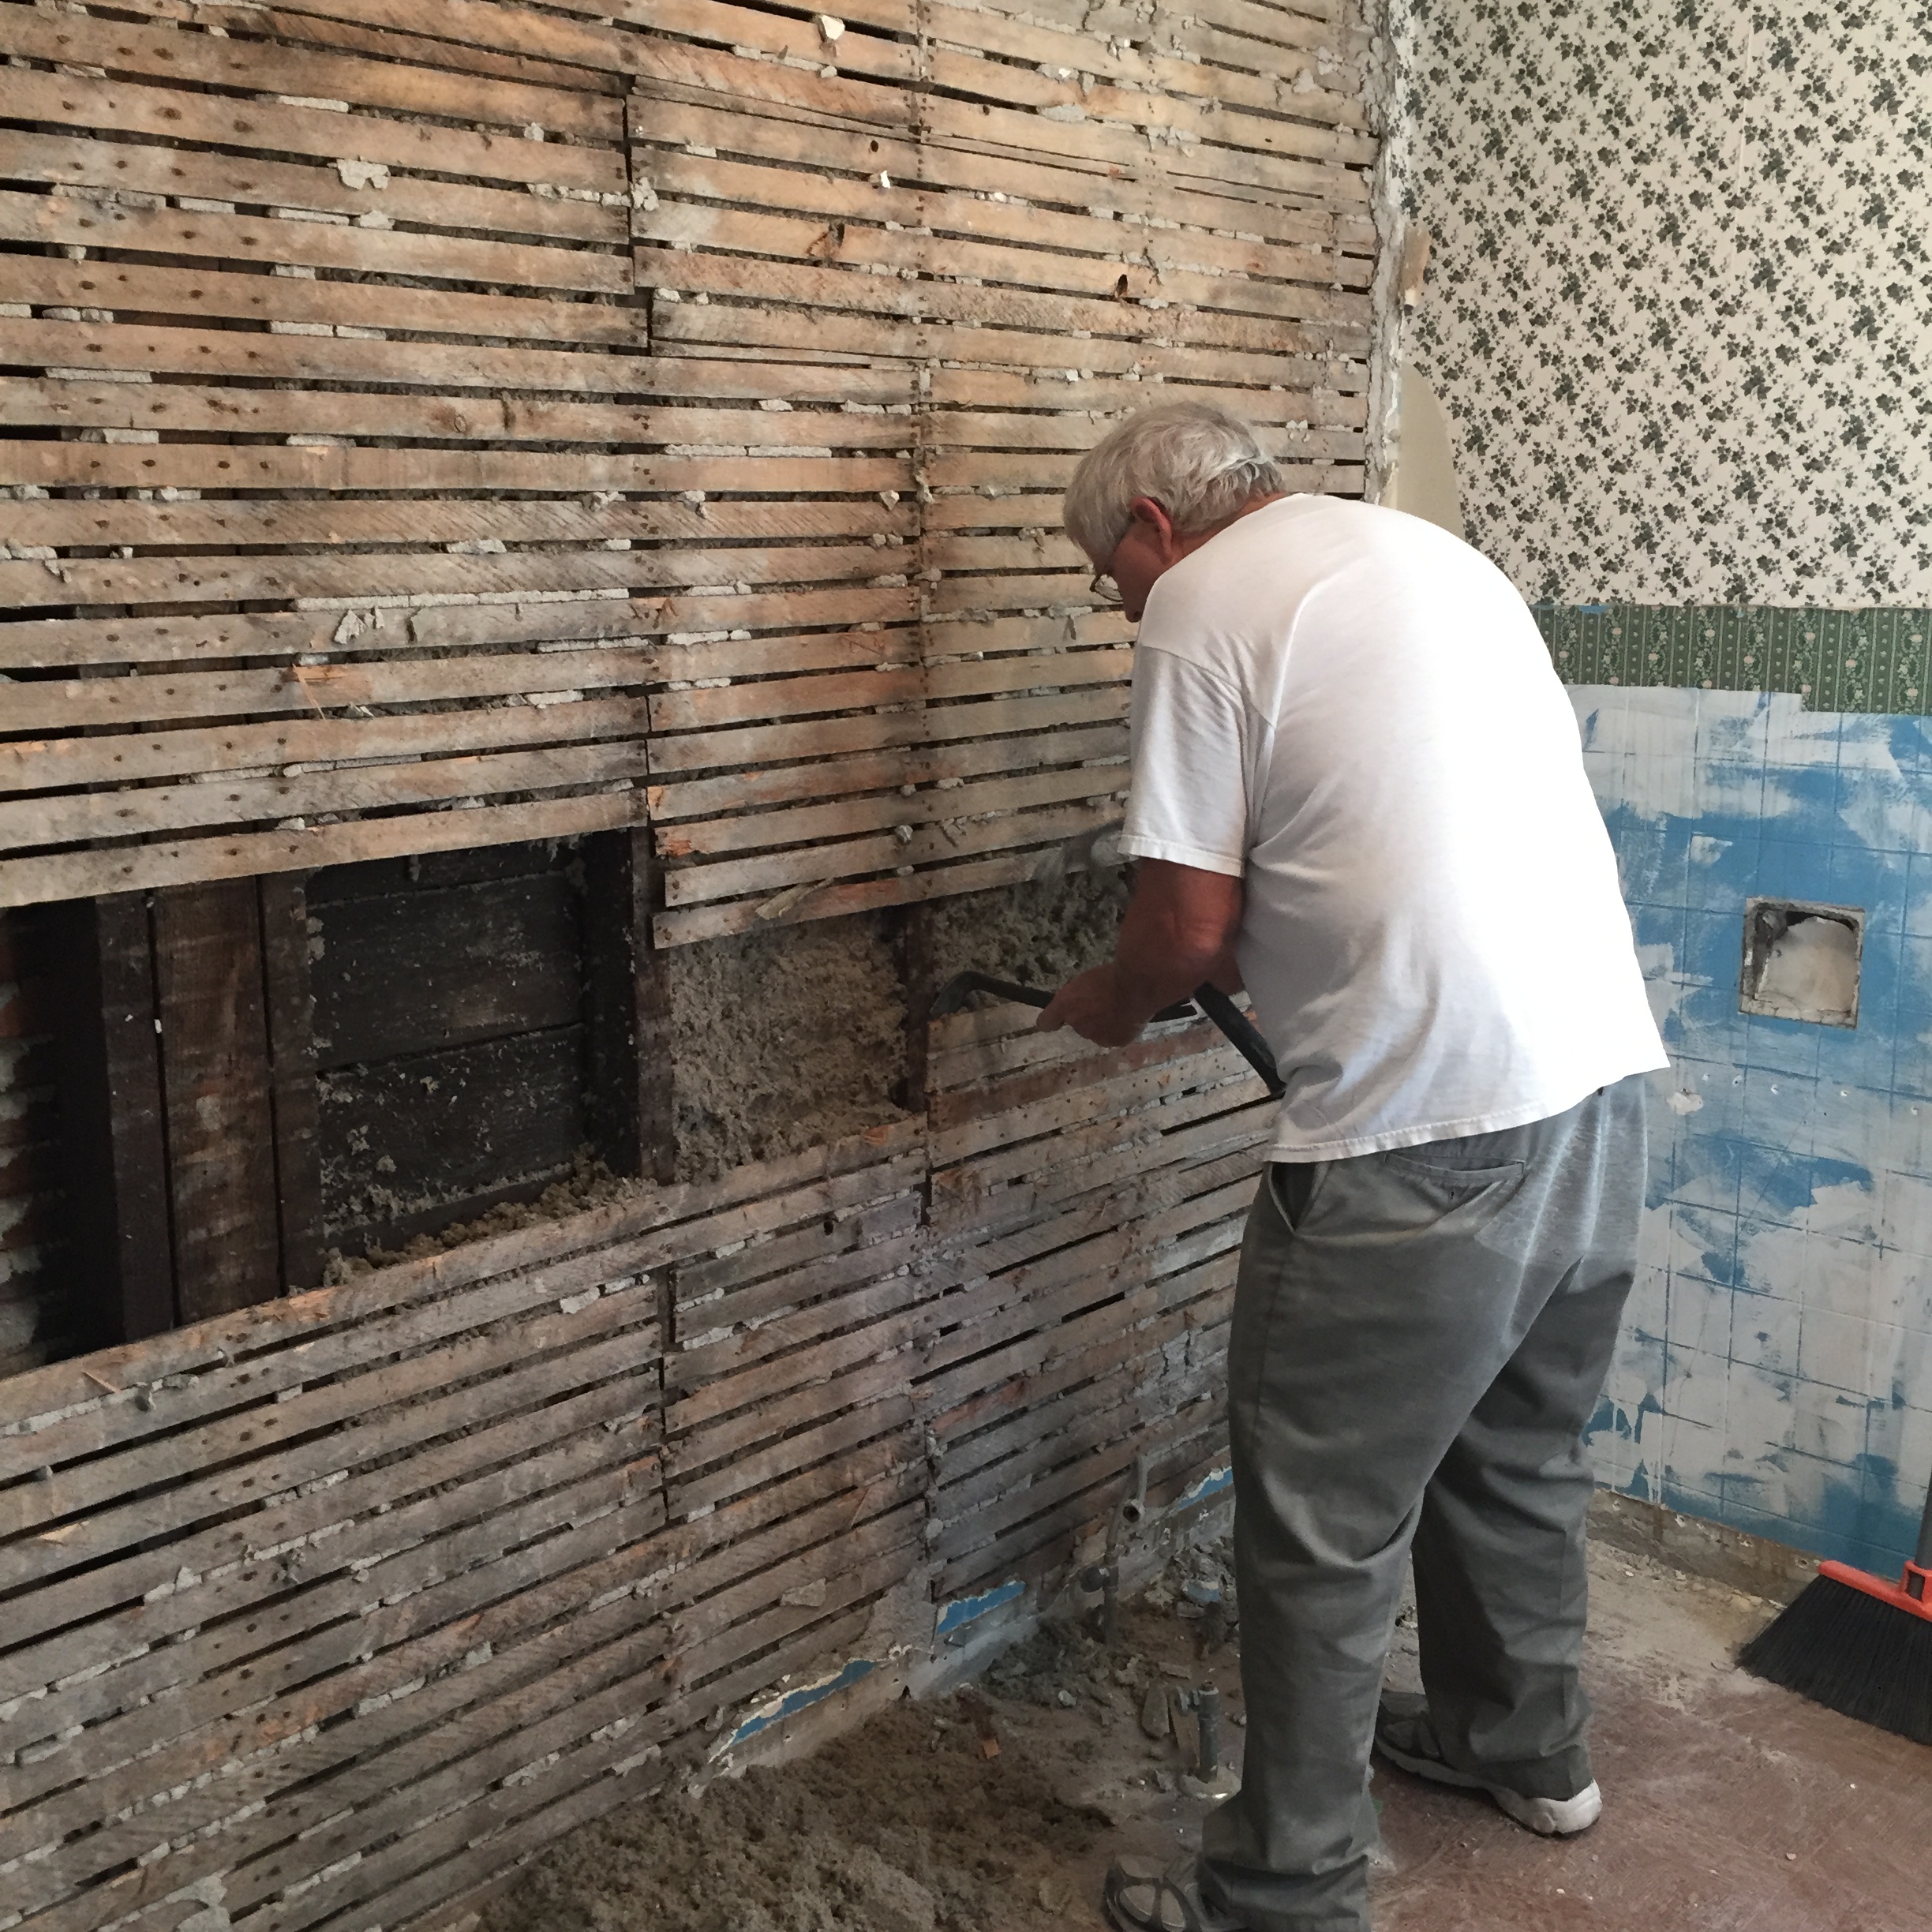
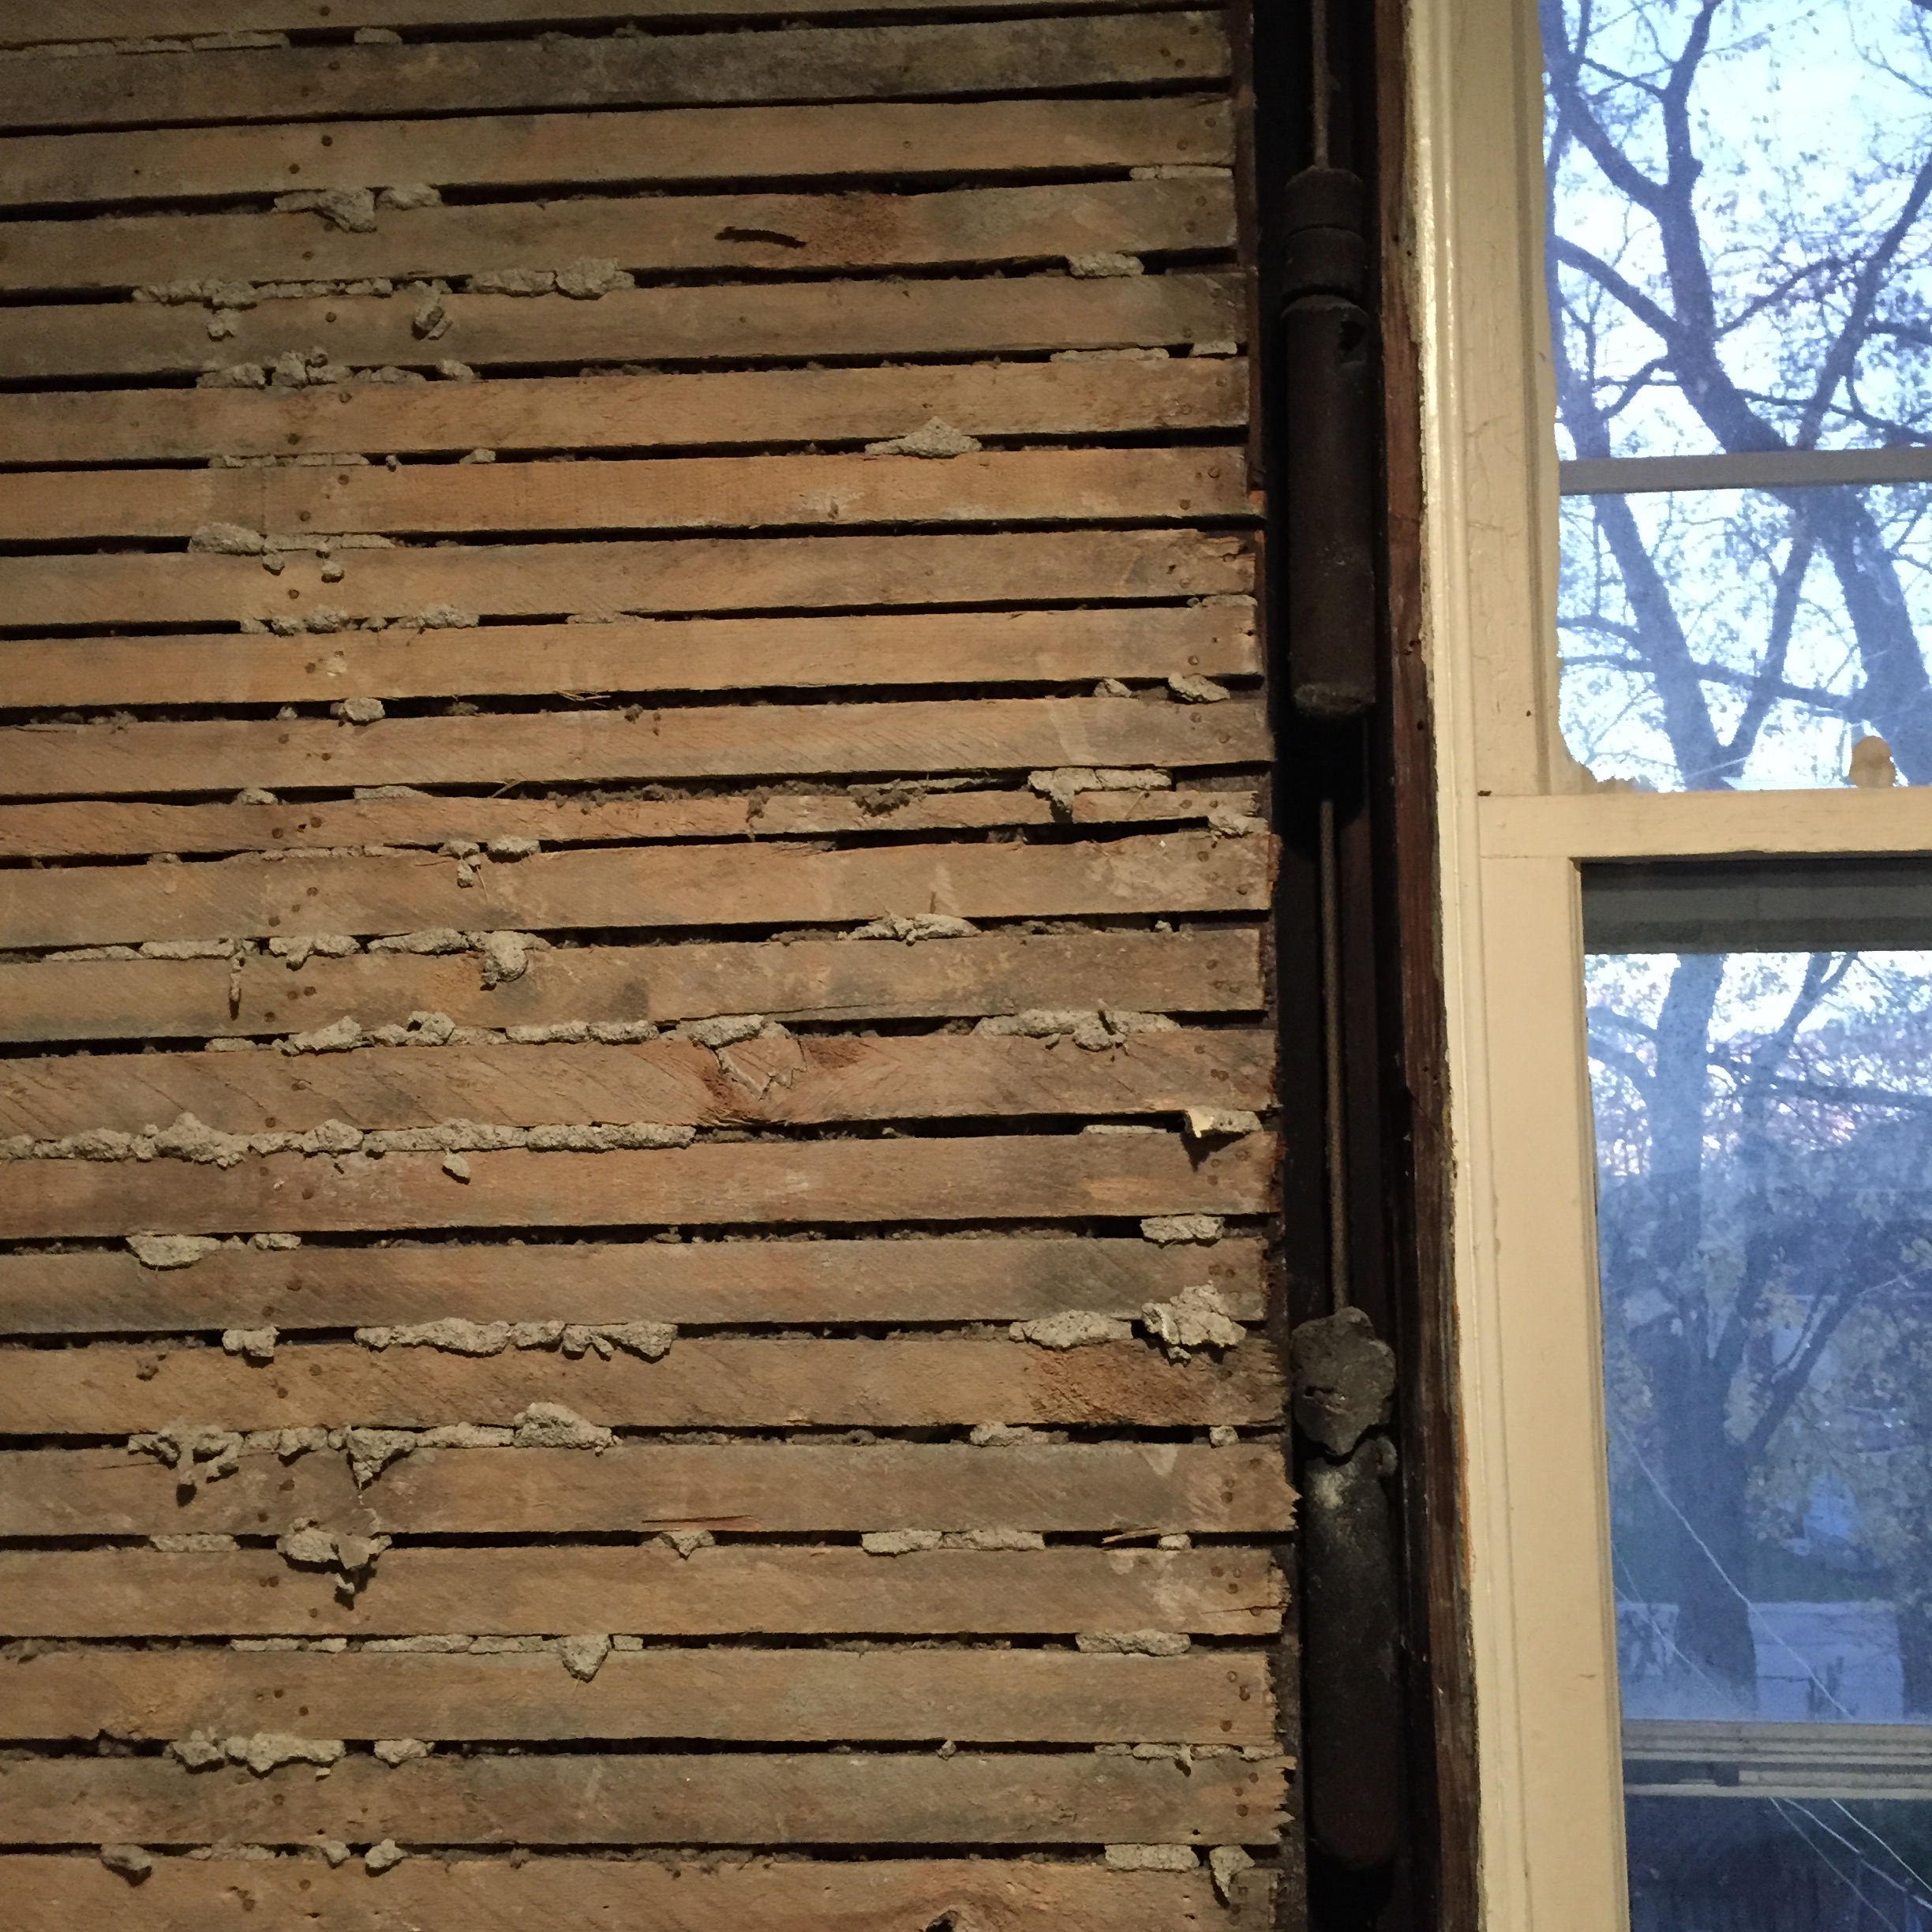
We found out as we dug into the lath removal that it appears the previous owner tried to insulate in places with some blown-in cellulose. We will still be coming back with spray foam in places (a topic for another time) but it was nice to see and learn that the house is at least somewhat insulated. Below you can see the wall type difference at the connection between an inside wall (left) and an outside wall (right) on the left portion of the bathroom.
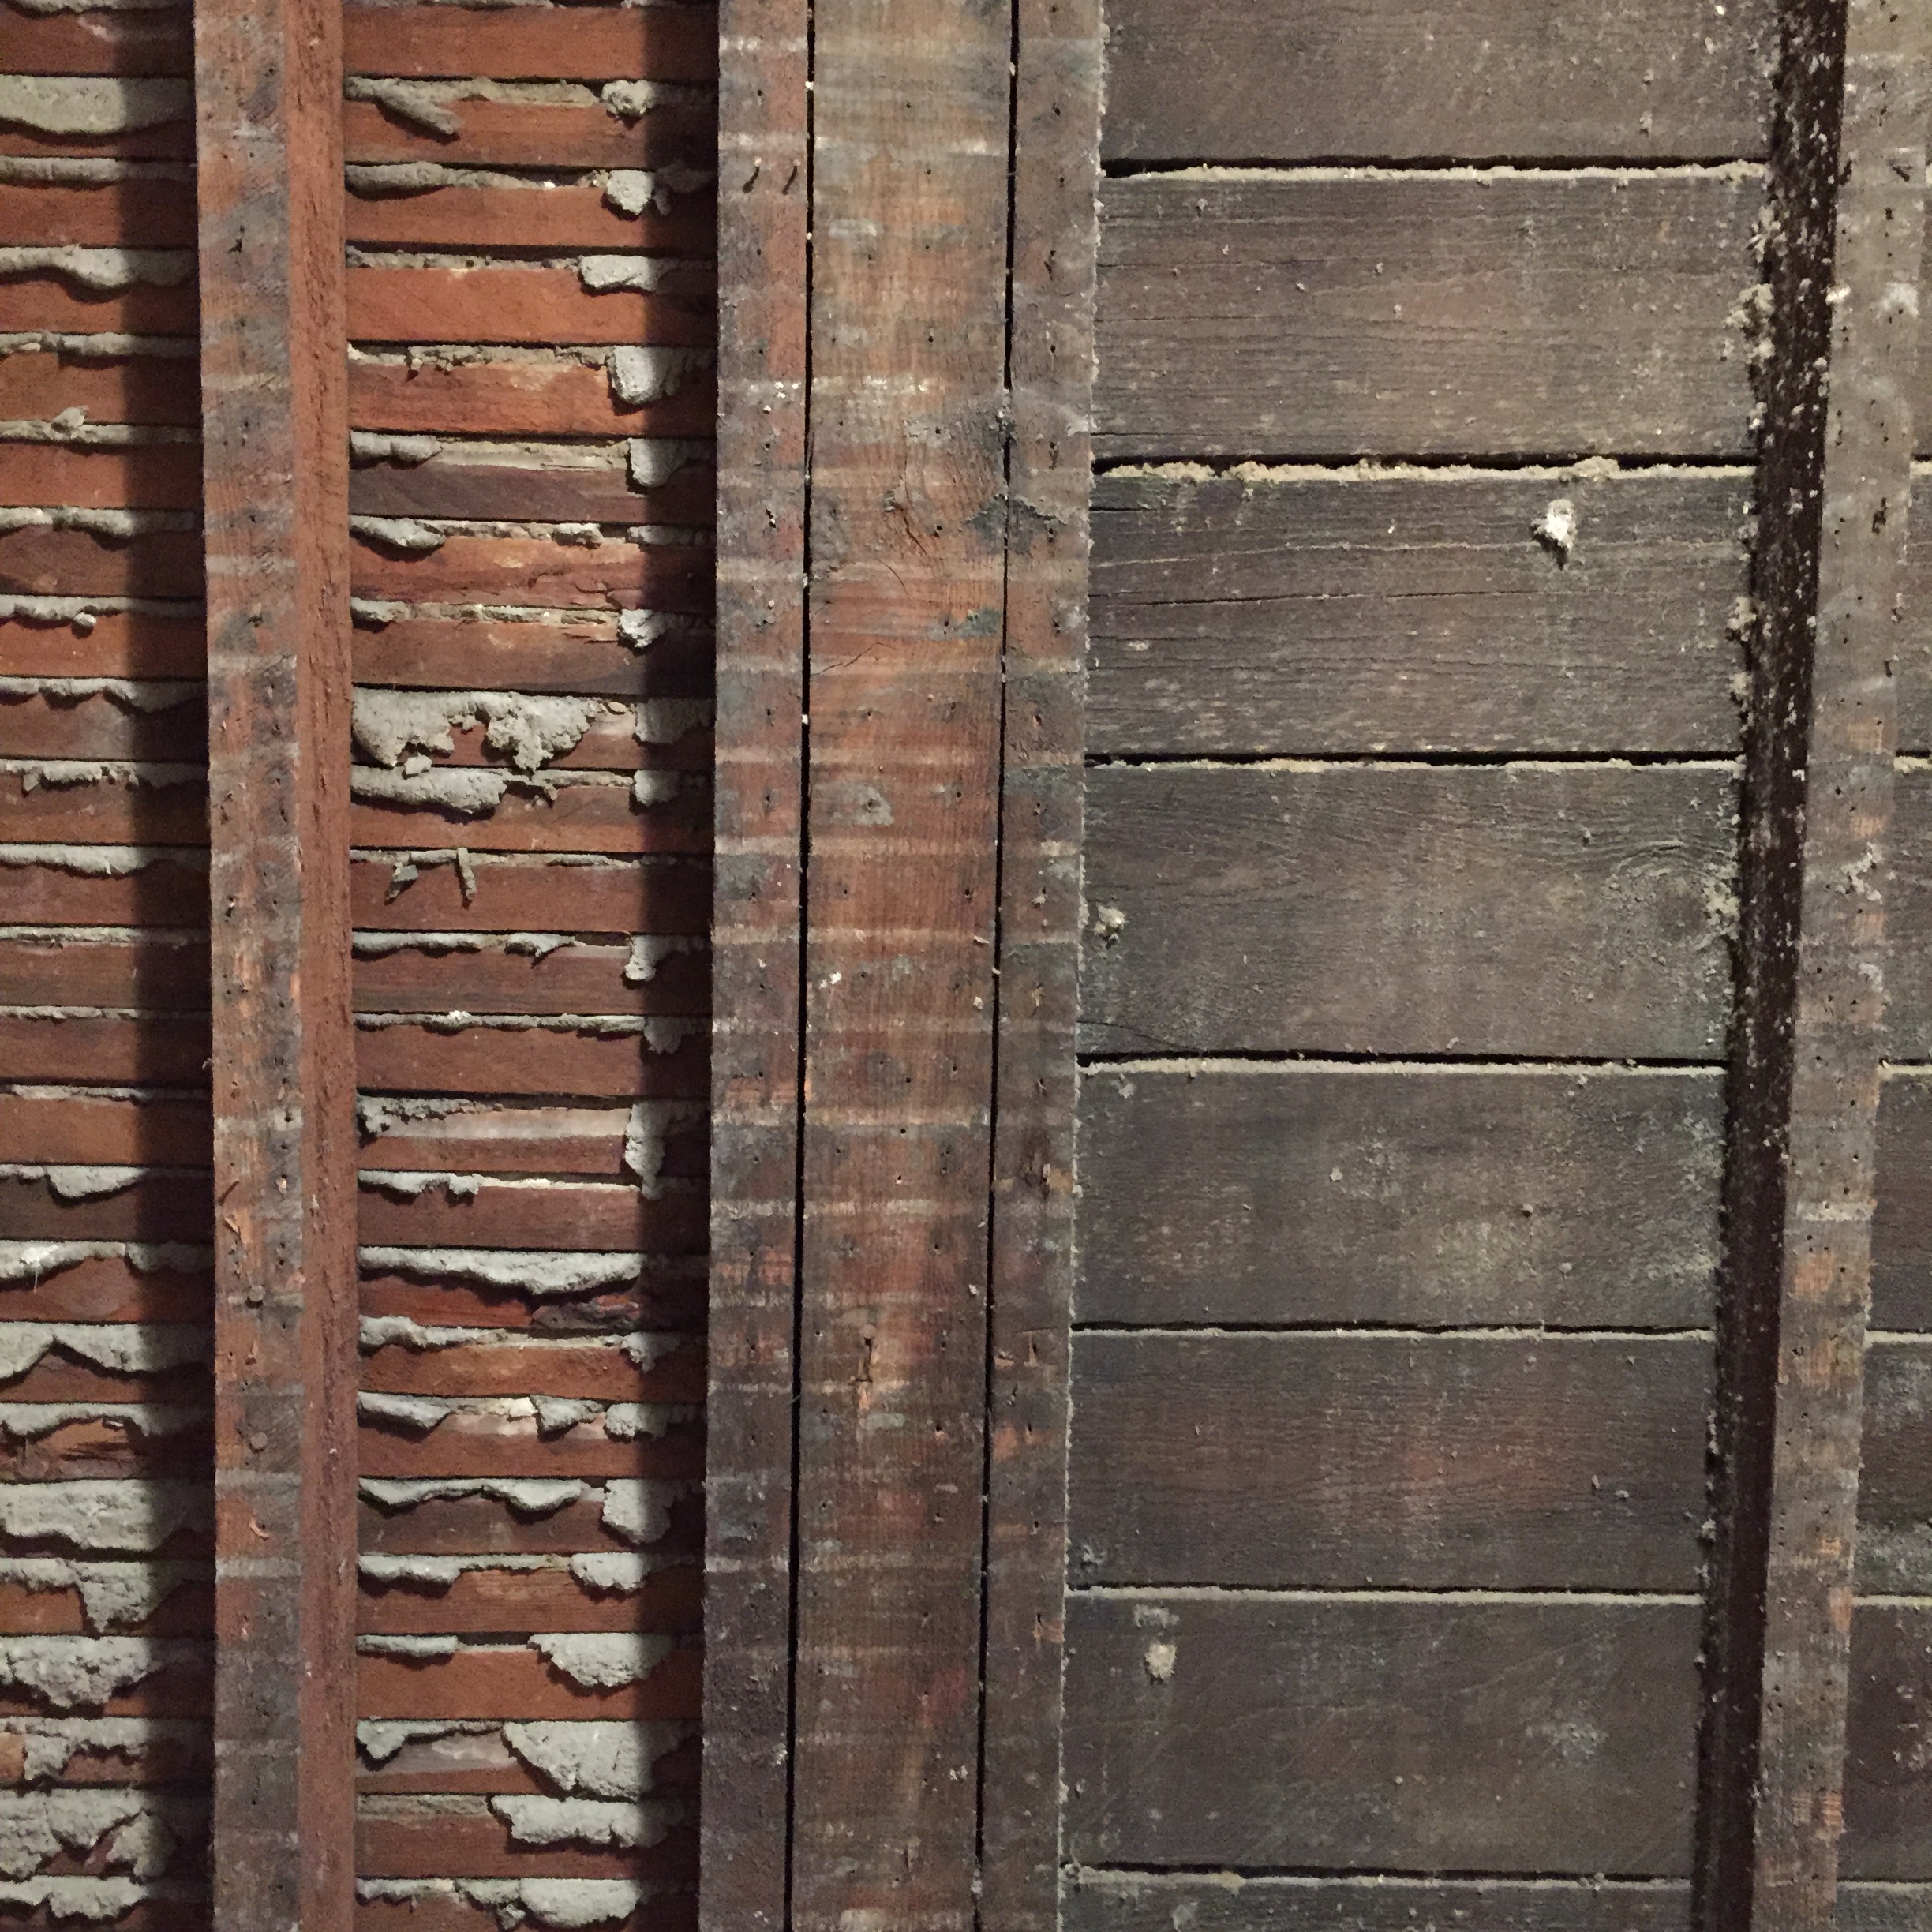
Note the studs. Those are original 2″x’s…that’s what an old house will get you.
Well that pretty much wraps up show and tell for this week. In non-picture notes:
- More demo will occur tomorrow and over the weekend.
- The washer and dryer were delivered last week (my mom is still concerned about stacking them).
- The tile arrived today and is on the schedule for pick up.
- The porcelain paint to refinish the cast iron tub has been purchased.
- The sink cabinet, mirror, and faucet have been purchased.
What is left to be done:
- Finish removing plaster/lath.
- Insulate.
- Plumbing/electrical.
- Greenboard and Tile (and paint).
- Source shower ring and fixture for tub.
- Order toilet.
- Install all fixtures/furniture.
And voila! You have yourself a bathroom. Easy, right? 😛
This is my first foray into DIY remodeling, let alone bathroom remodeling. I’d love to hear your thoughts below or on any various form of social media/email.
Until next time,